Introduction
Ducky has long been known as one of the premium players when it comes to factory-built keyboards, but with this new ProjectD the tables have turned. The unique proposition of the ProjectD 65 is that you have to build it yourself, and we’re not talking about a couple of screws to secure a switch plate to a PCB here. Everything from the case to the stabilizers has to be assembled by the user, making this an interesting DYI package for keyboard geeks. Read our full Ducky ProjectD 65 Outlaw review to find out everything you want to know about this interesting new product.
At A Glance
Ducky ProjectD 65 Outlaw
Ultimately, the Ducky ProjectD 65 is a very interesting product and I had a ton of fun with it. The fact that the end result is a premium custom keyboard makes me all the more proud to have built it myself, but it’s also a niche product. If you don’t care about the ‘build it yourself’ aspect then there are other options, and if you’re purely about gaming performance then your money is better spent elsewhere.
Pros
- ‘Build your own keyboard from scratch’ idea is interesting and fun
- Comes with a lot of extras that let you finetune your experience
- Clear assembly instructions
- Very nice keyboard once finished
- Comes with robust and luxurious carrying case
- Building your own keyboard from scratch entirely feels very rewarding
- Comes with all the necessary tools
Cons
- Not for completely inexperienced people
- No explanation in the manual on what different materials do for the sound/feel
- Comes without switches or keycaps so the final price makes it an expensive product
- Some screws got stripped after disassembling the board once
- No hall effect switch functionality, making it less ideal as a gaming keyboard
Specs
| Form Factor |
65% |
| Switches |
None (Barebones) |
| PCB |
Hotswappable |
| RGB |
Yes |
| Height |
4.8 |
| Width |
33.3 |
| Length |
12.8 |
| Weight |
1119 |
First Impressions and Materials
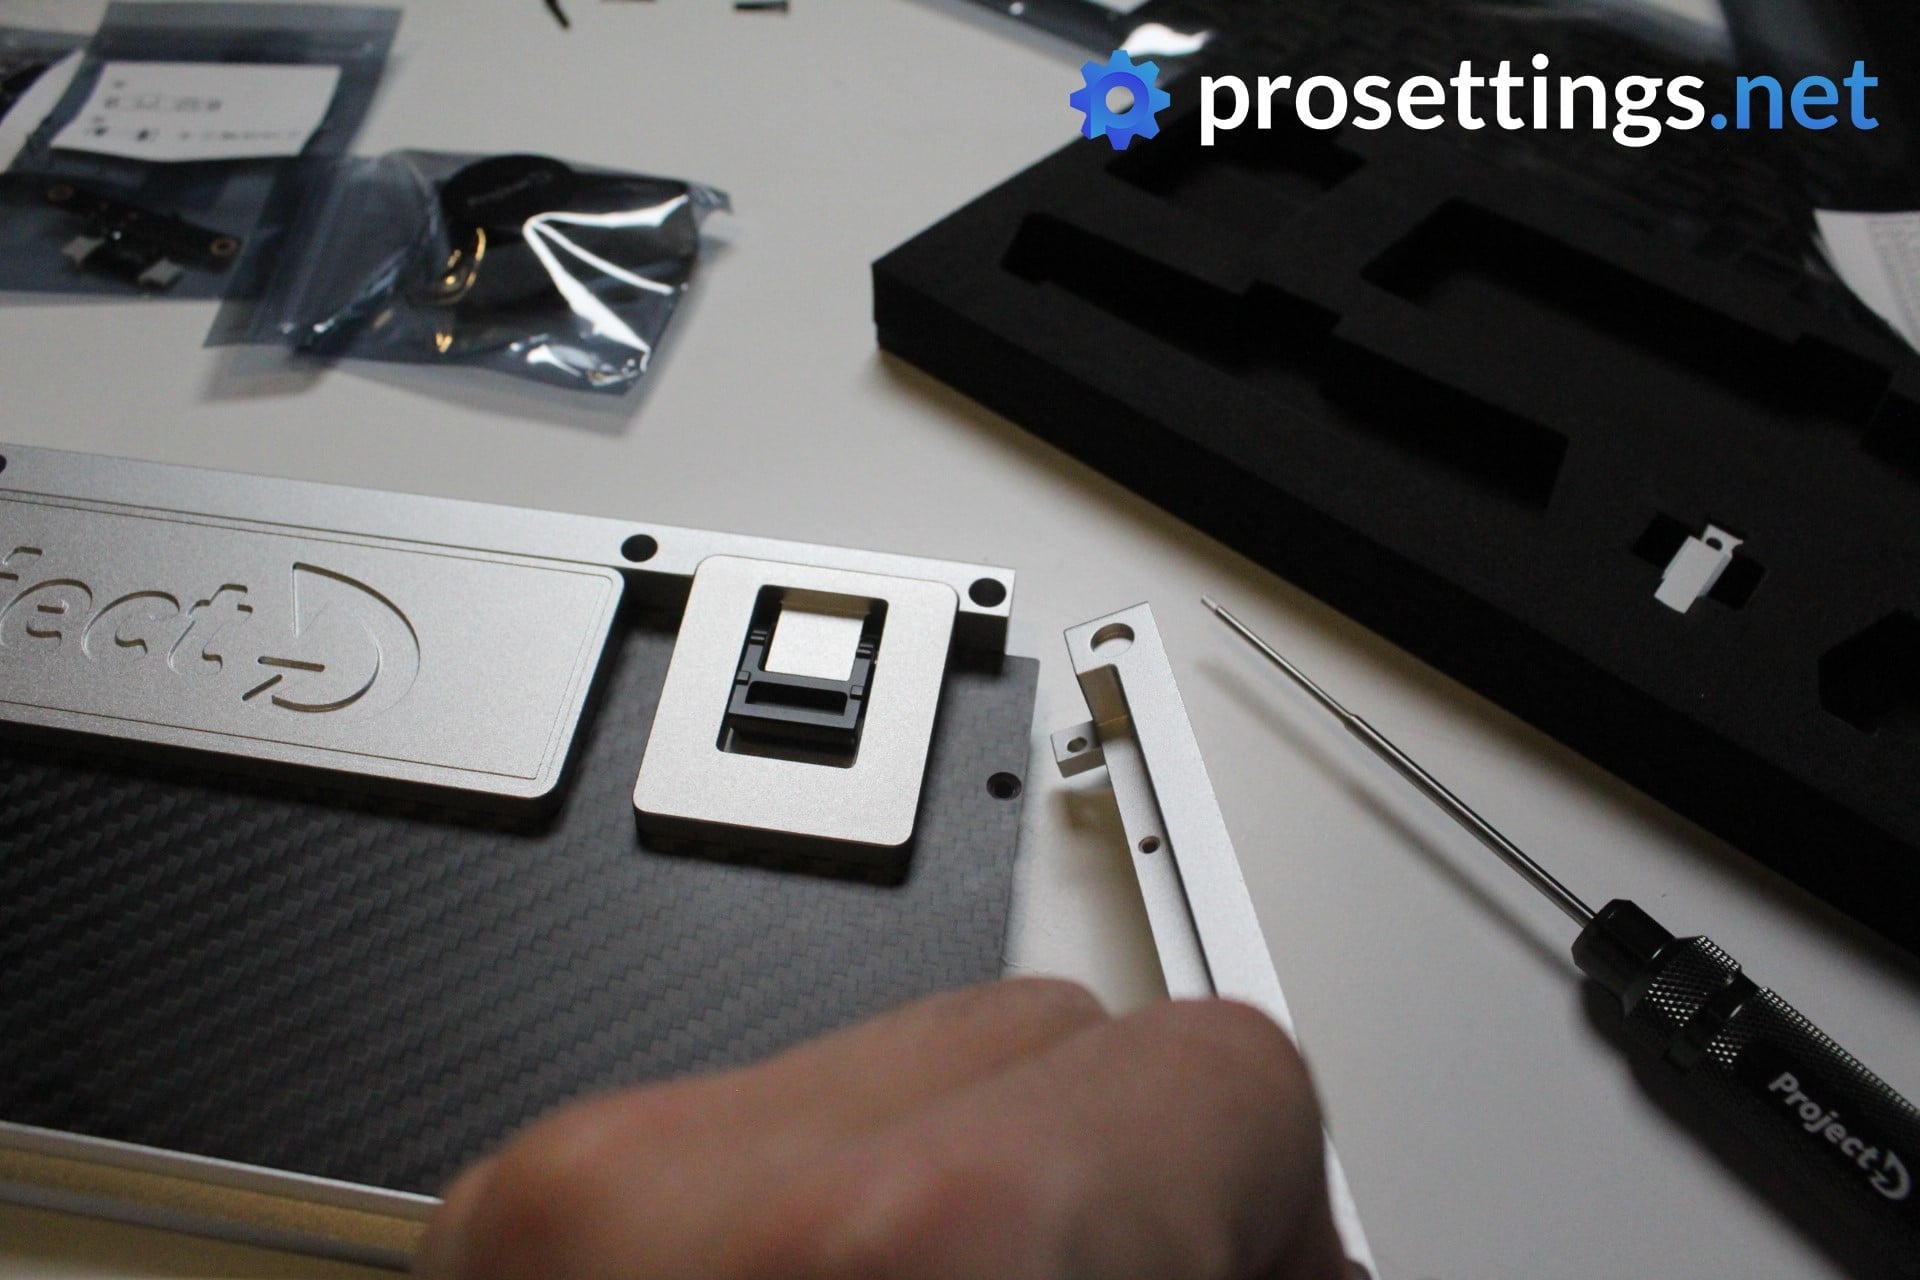
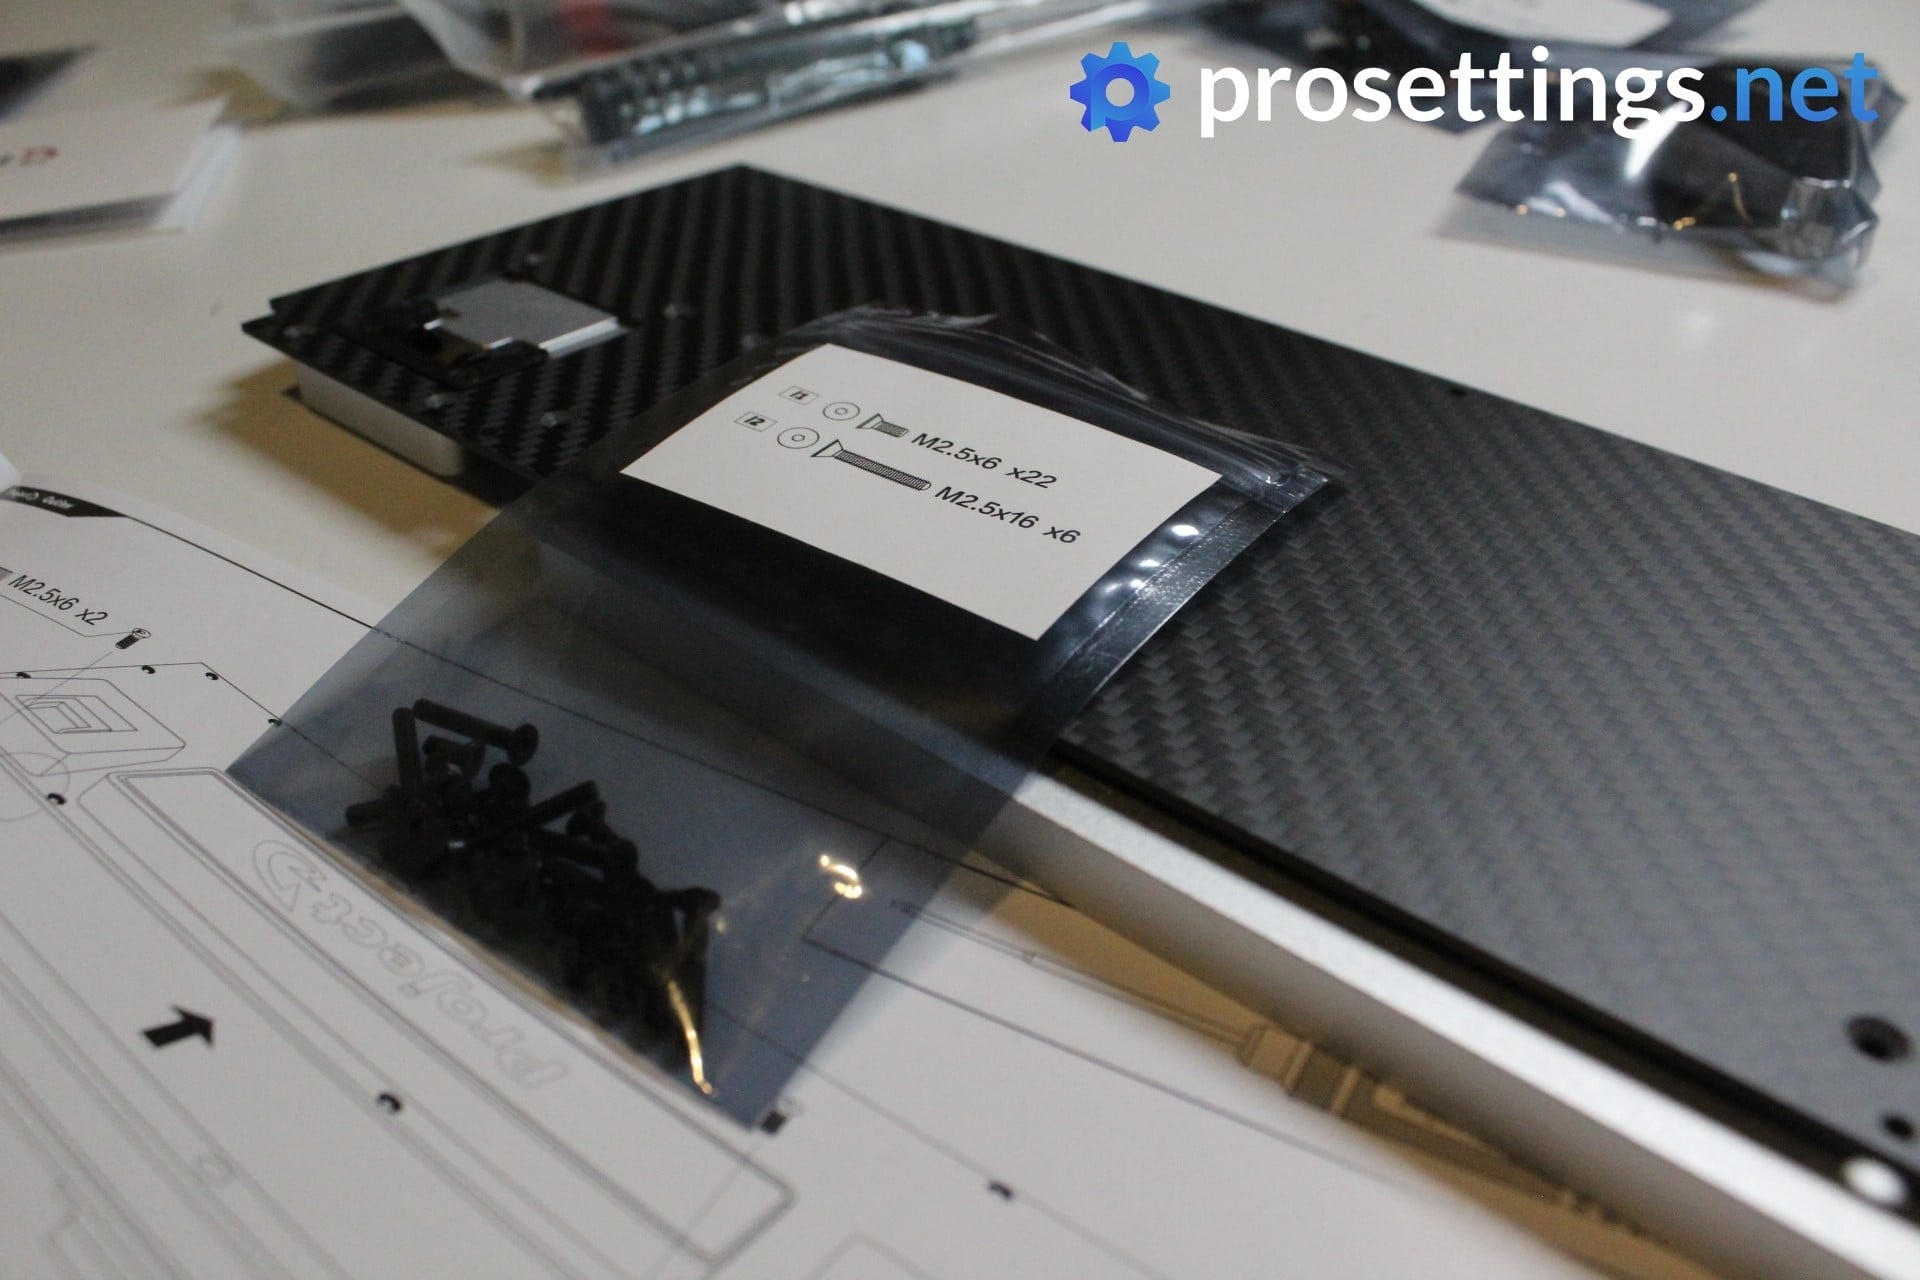
The Ducky ProjectD 65 makes a great first impression. The board comes in a luxurious carrying case, and inside of that case there’s a treasure trove of stuff to discover. The individual building blocks are neatly secured within foam trays, and the various screws are tucked away in neatly labeled bags.
At first, the whole thing seems extremely intimidating, but if you take your time to properly lay everything out before getting into it everything will make a lot more sense. Something that’s clear pretty quickly is that things can get finnicky. You’ll have to use a lot of very tiny screws that are easy to lose, so make sure that your working space is free of clutter before diving into it.
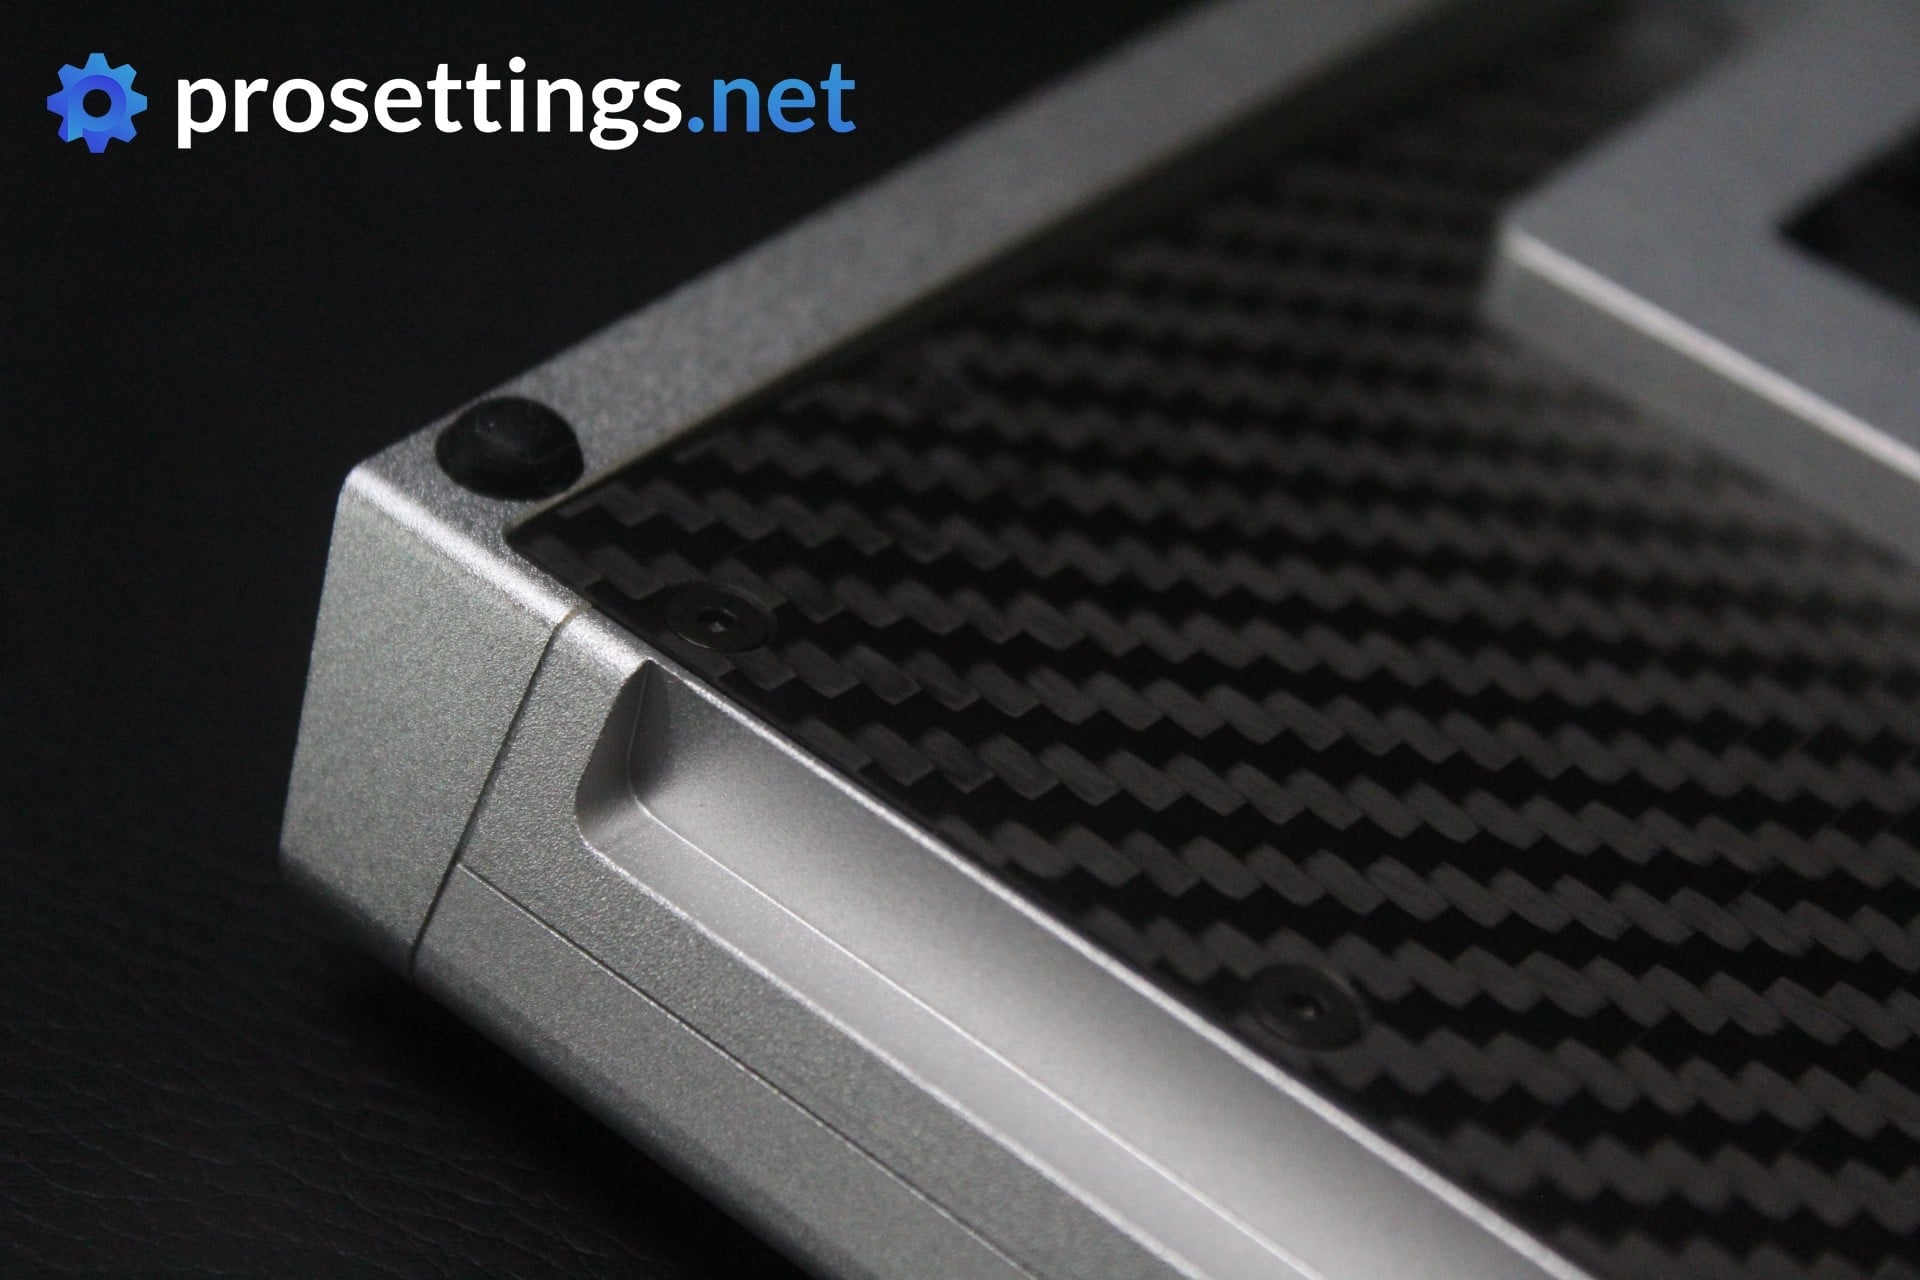
Once everything is laid out, it becomes clear that Ducky spared no expense with the ProjectD 65 Outlaw. The case is made out of thick and sturdy aluminum elements and the plate at the bottom of the board is made out of carbon fiber. These elements give the board a modern, almost motorsports type of vibe.
Something else that also becomes clear (and is also clearly mentioned on Ducky’s website) is that the board comes without switches and keycaps. If you don’t have these lying around you’ll have to purchase them yourself. If you want to get a pack of quality switches and keycaps this’ll cost you a pretty penny, so it’s good to be aware of this before purchasing the board. This is not a project for budget-minded users.

Packaging
- Carrying case
- Case (made up out of various aluminum elements and a carbon fiber plate)
- PCB
- FR4 plate
- POM plate
- Plate foam
- Case foam
- Stabilizers
- Rubber gaskets
- Poron foam gaskets
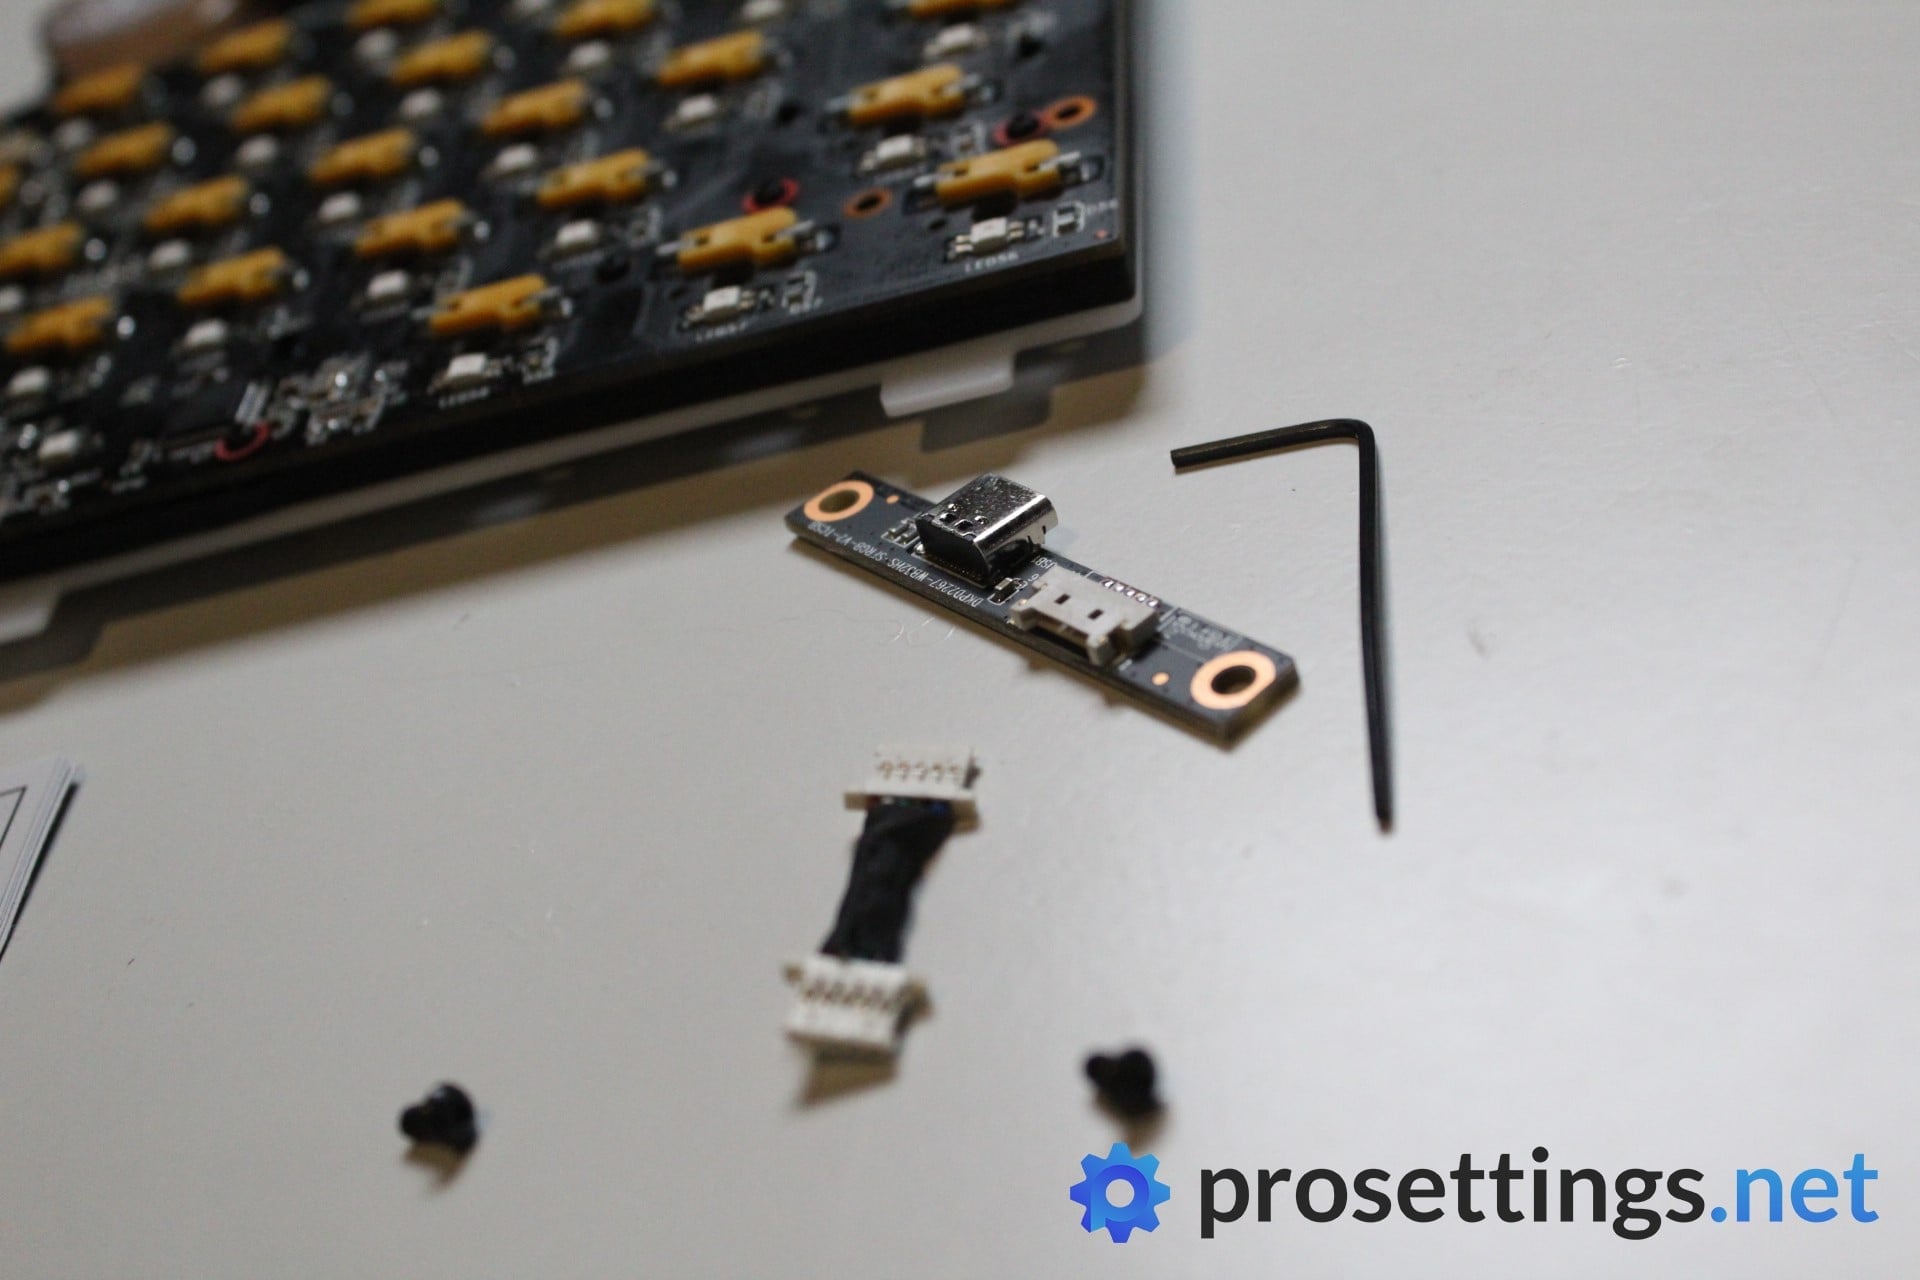
- USB-C Cable
- Switch puller
- Keycap puller
- Switch/stabilizer lube
- Brush
- Screwdriver
- Hex key
- Screws
- Manual
- Hand-signed QC card

Assembly Process
One of the main draws of the Ducky ProjectD 65 Outlaw is the fact that you have to build it yourself. The case has to be assembled, the stabilizers have to be put together and lubed, and the plate and PCB need to be put together, so there’s plenty to do.
Just to frame my experience: I would call myself moderately experienced with mechanical keyboards. I own a couple of custom boards and have half a dozen bags of lubed switches lying around, so everything I’m about to say comes from someone who knows the basics but isn’t an aficionado by any means.
Manual
I found the manual to be easy to read and understand. Every page outlines the tools that you’ll need and all screws and parts come in labeled bags.
One remark I do have: there are a couple of choices you have to make when assembling the board. You have to choose between a POM plate and an FR4 plate, for example, but the manual doesn’t give you any information about the characteristics of these different plates. The info is of course just a Google search away, but just a couple of bullet points in the manual would’ve been handy here for people who aren’t familiar with the keyboard scene.
Everything you need is in the packaging, so you don’t need your own tools if you do everything correctly. A pair of tweezers might come in handy but isn’t required.
Assembly
Assembly of the ProjectD 65 took me around an hour, including the lubing and assembling of the stabilizers. Again, though: I’ve done these things before. If you’re completely new to keyboards it’ll still be doable but be warned that this is a lot more involved and finnicky than something like a LEGO set.
Some of these screws are tiny and if you have larger hands or thicker fingers like I do it can be quite a chore to get the smallest pieces into place. Dropping them is a nightmare so I recommend you to stay away from carpets or cluttered floors when building the board.
All in all, though, the whole assembly process is fun and engaging, if you’re into these kinds of things. If you don’t like building stuff and playing around with screwdrivers and tiny brushes you’ll definitely want to skip this board. The end result is definitely very nice (more on that later) but at this price point there are other options available that don’t require you to build the case yourself. The building process is part of the product and experience.
Materials and Design
This is a premium keyboard. At an MSRP of $299 it might be middle tier in the custom keyboard scene but in the gaming space and for casual users this is definitely an expensive board. Luckily, its materials (mostly) live up to the asking price.
Materials
The case is made out of various chunks of thick and sturdy aluminum that you have to put together yourself. The bottom plate is carbon fiber. This carbon fiber plate combined with the silver board I got (there will be other colors available as well) makes for a really nice looking board if you ask me. The blacks of the carbon fiber contrast nicely with the silver aluminum, and once assembled it becomes a modern-looking product.
Design
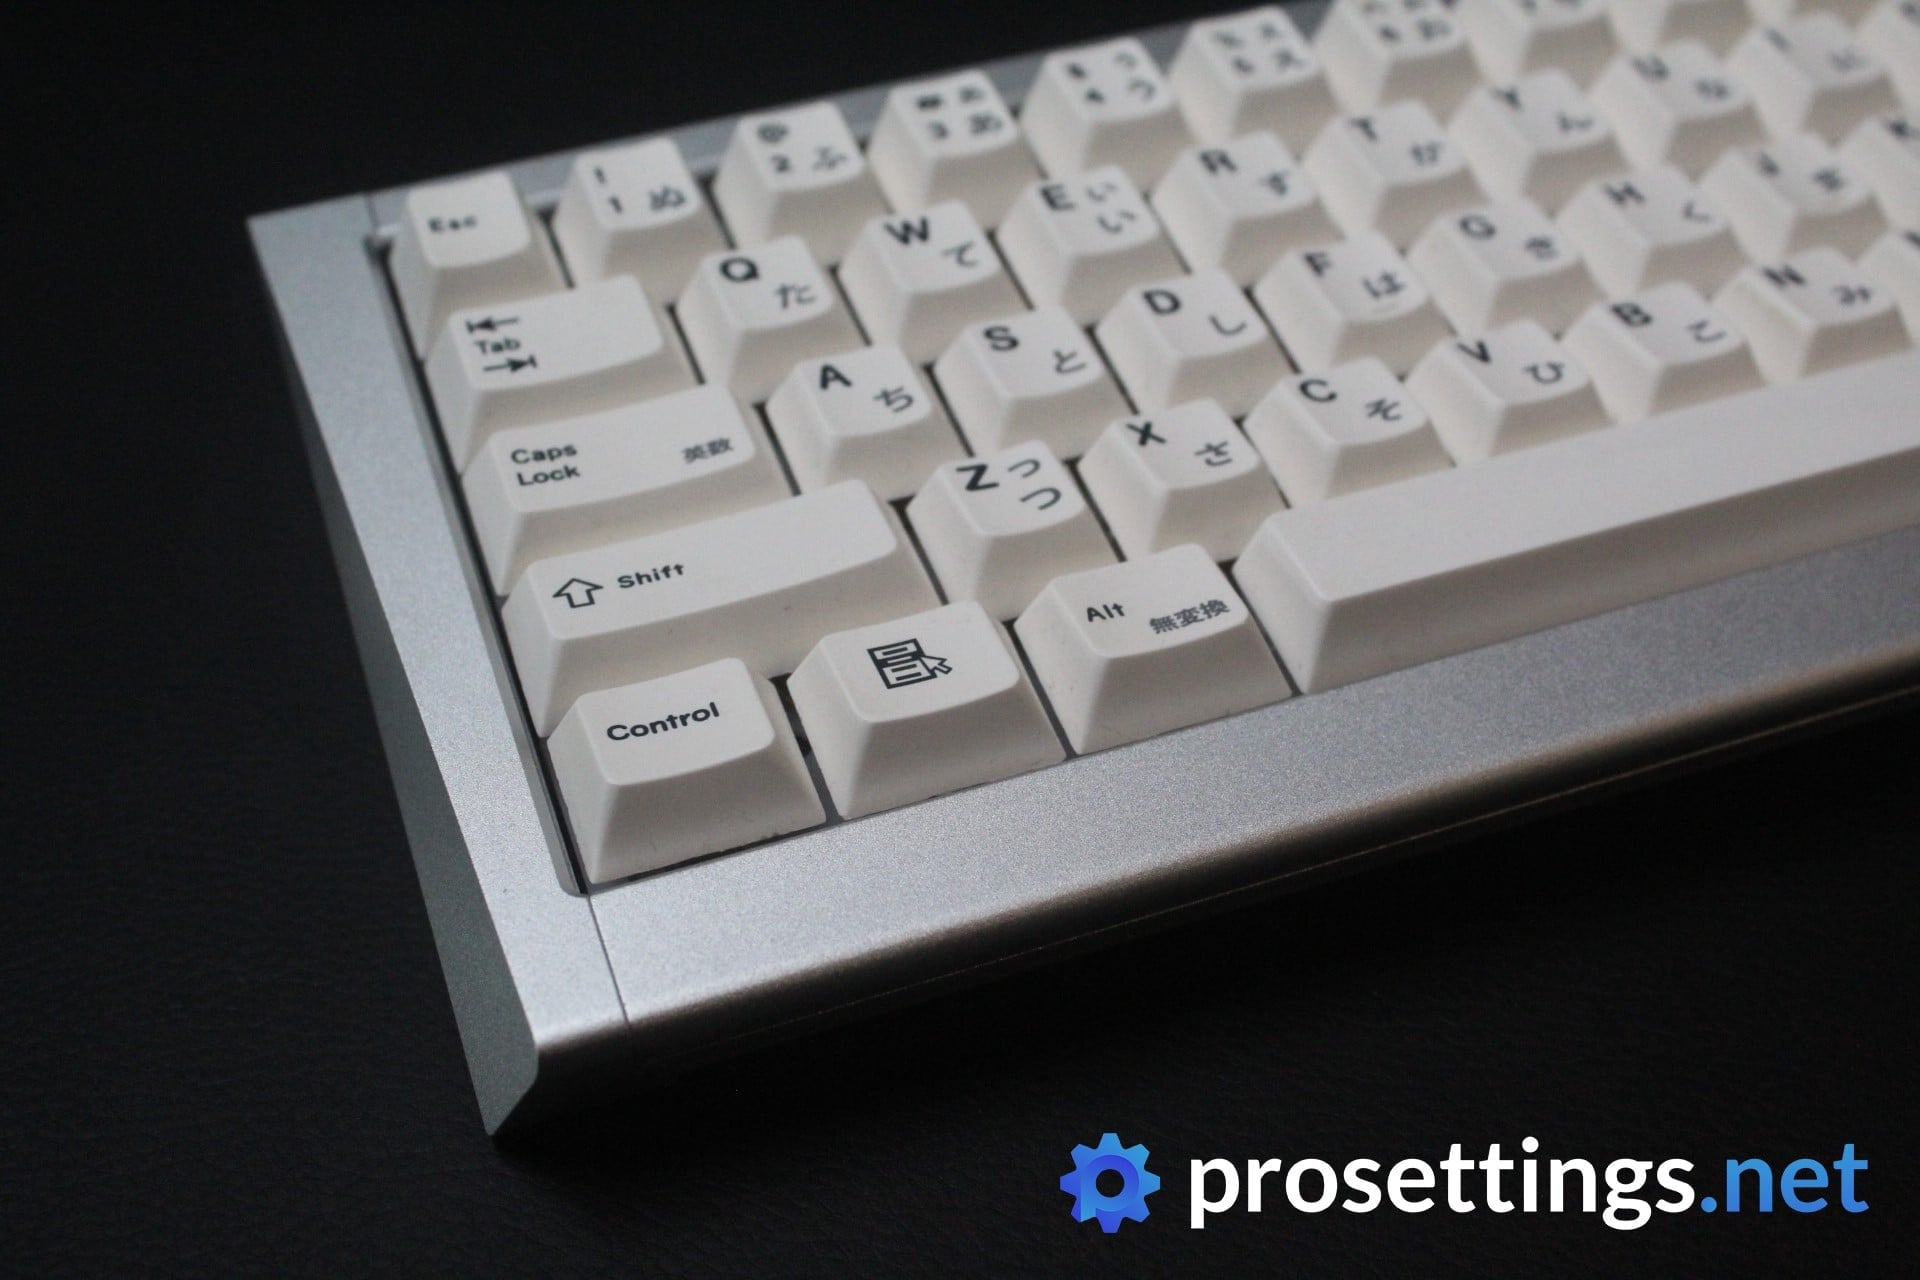
The ProjectD 65 Outlaw is a heavy keyboard that feels great. The embossed ‘ProjectD’ on the weight at the back makes for a nice finishing touch, and while the typical Ducky design style with a lot of edges and trapezoidal overhangs won’t please everyone I have to say that I like this board’s look. It has a sort of retro-futuristic look with the carbon fiber and if you combine that with a set of appropriate keycaps and a coiled cable it’s quite a looker.
Screws
One thing I have to mention is the fact that I ran into an issue with some screws. When I tried to disassemble the board (which is something that’s encouraged by Ducky since there are multiple configurations to try out) I simply could not manage to remove three particular screws. Upon closer inspection, I noticed that their drive had stripped. Considering the fact that I had only used the supplied screwdriver and hadn’t used excessive force I could only conclude that this was a problem with the screws.
I contacted Ducky about this issue and they were very helpful, providing me with a number of techniques to try and get them out and offering to have the board shipped back to them in case I really couldn’t get them out. Luckily, I was able to get them out with the help of a family member and a drill bit though. This family member is a very skilled craftsman so he managed to get them out without damaging the other parts of the board, but I’m not quite sure that I would be as successful if I had to figure out a way to get them out on my own.
I got my board early so that I could get my ProjectD 65 Outlaw review out in time for release, so it might’ve been a pre-production issue, but if you’re assembling the board I would definitely recommend exercising caution when tightening the screws just to be sure. For full context: Ducky also sent me a package of replacement screws and these have been absolutely fine for me.
Plates and Gaskets
While assembling the ProjectD 65 Outlaw, you come across two ‘forks in the road’ where you have to make a decision.
The first decision you have to make concerns the plate material. There’s a POM plate and an FR4 plate. A POM plate will provide a lot of flex and a thocky, warm sound. The FR4 plate is a bit less flexible and has a poppier sound. I opted for POM, as I like the flex aspect (I’m a heavy typist) and a thockier sound.
The second decision concerns the gaskets. The ProjectD 65 is a gasket-mounted keyboard, which basically means that gaskets sit between the plate and the housing, giving the board a softer, more cushioned feeling due to the lack of direct contact between the plate and the case. Here, you can choose between rubber and poron gaskets. The poron foam gaskets seemed to provide less cushioning to me, and as I like flex and ‘bounce’ in my keyboards, I went with the thicker rubber gaskets.
Everyday Usage
Once the board is assembled it’s a matter of installing switches and keycaps and you’re good to go. Ducky did send me a pack of switches and a box of keycaps, but since these aren’t part of the official product (it comes without switches and keycaps) I’m not going to go into them too much.
Switches
The switches they gave me to test the board with were Cherry’s new Red MX2A switches and these are decent linears, but nothing more. They sound alright and feel decently smooth, but I wouldn’t say that they’re a fantastic new innovation. They are factory lubed and and improvement over the old Cherry Reds, but there are better linear switches out there if you ask me.
Of course switches are a personal thing: I used to love Cherry MX Browns (which, in case you didn’t know, is kind of a meme in the keyboard community) and other tactile switches, and today all of the boards in my rotation house linear switches so I will be the first person to tell you that there isn’t an objective ‘best switch’. It doesn’t really matter anyway; the ProjectD 65 comes without switches and has a hotswap PCB, so you’re free to put in almost any switch that you like, even if that is a Cherry MX Brown.
I’ll be short here. If you’re a gamer and you’re looking for a top tier gaming keyboard this ain’t it, and I say that for one simple reason: the Ducky ProjectD 65 is not compatible with Hall effect (see What Are OmniPoint Switches) or optical switches.
You can of course put them in, but there’s no tech inside to process them so they’ll behave like any regular mechanical switch. This won’t matter at all to people who aren’t going to be gaming with the board, but in an age where switches with customizable actuation points and Rapid Trigger functionality are becoming the norm it’s a bit of a handicap to play without one if you’re a serious gamer, so this is a bit of a missed opportunity for Ducky.
Of course you can still frag out with this board: pro gamers have played without those fancy switches for years and years so it’s not as if they’re a requirement to get good, but if you’re buying a board mostly for competitive gaming then you’re much better off spending your money on a SteelSeries Apex Pro Mini (see my SteelSeries Apex Pro Mini review) or a Wooting 60 HE or something like that. These perform better for gaming and you’ll have money left over.
Typing Experience
This is without a doubt where this board shines. It might not beat dedicated gaming keyboards in the online arenas of CS2 and VALORANT but it does beat pretty much all of them when it comes to the everyday typing experience.
Of course sound and feel is subjective to a certain extent, but I love the way this board makes my favorite switches sound. With the POM plate and the rubber gaskets I’m also getting an extremely pleasing tactile experience. There’s a pleasant give to the board when typing, which dampens my caveman-like style of typing somewhat, and there’s no case ping or other annoying sounds when using the ProjectD 65 so it’s a pleasure to use for hours on end when working.
It looks, feels, and sounds like you’d expect from a higher tier keyboard, and while the sound will greatly vary depending on your choice of plate, switches, and even keycaps, you do get options to tune the sound and feel to your liking thanks to the two plates and gasket mount options, so you’re bound to get to something you like here.
This sound test was recorded with ePBT Grey Japanese keycaps, non-modded Cherry MX2A switches, the POM plate, and the rubber gaskets.
Conclusion
The Ducky ProjectD 65 Outlaw is a high quality mechanical keyboard that comes with two plate and gasket mount options straight out of the box, making it customizable to your tastes. Combine that with a hotswappable PCB (meaning that it’s super easy to change switches) and you’ve got a board that I think will accommodate pretty much everyone. You might not love the sound and feel of the board, but you’re also not going to hate it due to how customizable it is.
At $299 (without switches and keycaps) it’s gonna punch a sizeable hole in your wallet, though, and if you’re looking for the best gaming performance there are a lot of cheaper options that have features such as Rapid Trigger and customizable actuation points, which are lacking in the ProjectD 65. The ProjectD is, in my eyes, an enthusiast board aimed at beginning/intermediate keyboard enthusiasts that are willing to take the next step in their keyboard journey and go beyond the $100-150 prebuilts.
Just like it is with a LEGO set, the building factor is a major one, if you ask me. If you don’t like tinkering and building stuff, skip this. Building it is half the fun, and being able to say ‘I built this from scratch’ will be rewarding to some people (myself included) but if that’s not you then you’re perhaps better off spending your money on a different higher tier board that you don’t have to build yourself, especially since the building process can get finnicky at times.
Ultimately, the Ducky ProjectD 65 is a very interesting product and I had a ton of fun with it. The fact that the end result is a premium custom keyboard makes me all the more proud to have built it myself, but it’s also a niche product. If you don’t care about the ‘build it yourself’ aspect then there are other options, and if you’re purely about gaming performance then your money is definitely better spent elsewhere.
This product was received for free from the manufacturer and given to our reviewer to test and review. Brands and manufacturers have no editorial control over our reviews. For more information, check out our review FAQ.
Former semi-pro gamer turned writer, product reviewer, and community manager.