Highlights
- Mouse: use a DPI between 400-1600; use a polling rate of 1000-8000Hz
- Keyboard: Enable Rapid Trigger, set WASD to 0.2-0.4mm, set movement keys to 0.4-0.8mm
- Headset: Lower the bass response to hear important sounds (reloads etc.) better
- Microphone: Use Blue VO!CE for optimal microphone quality
Introduction
If you’ve got Logitech gear to game with you will probably know all about Logitech G HUB. It’s their software suite that allows you to customize and control their peripherals, and with certain products there are a ton of options to choose from, meaning that it can be hard to understand what the best options are. In this article, we’ll go over the best Logitech G HUB settings to get you started with your Logitech peripherals.
Note: different products have different customization options. Logitech has a ton of peripherals so it’s pretty much impossible to list the best options for every single product in this article. Take this article as a general approach to how you should set up your Logitech products.
Best Logitech G HUB Mouse Settings
Logitech likes to have their top gaming mice use the same sensor, so customization options for mice are going to be very similar.
Lighting
Lighting has no performance benefits whatsoever, so if you’re a hardcore competitive gamer you can just leave this off. Leaving the RGB lighting off also saves battery life, which is always a bonus. Modern competitive gaming mice from Logitech don’t even have RGB lights, so odds are you won’t even have to worry about this.
Assignments
This is basically Logitech’s macro editor and button rebinder. If you are someone who wants to have your mouse perform multiple actions with just one click or anything of the sort, this is where you need to be. There is no right or wrong here, as this is very dependent on personal preferences.
DPI
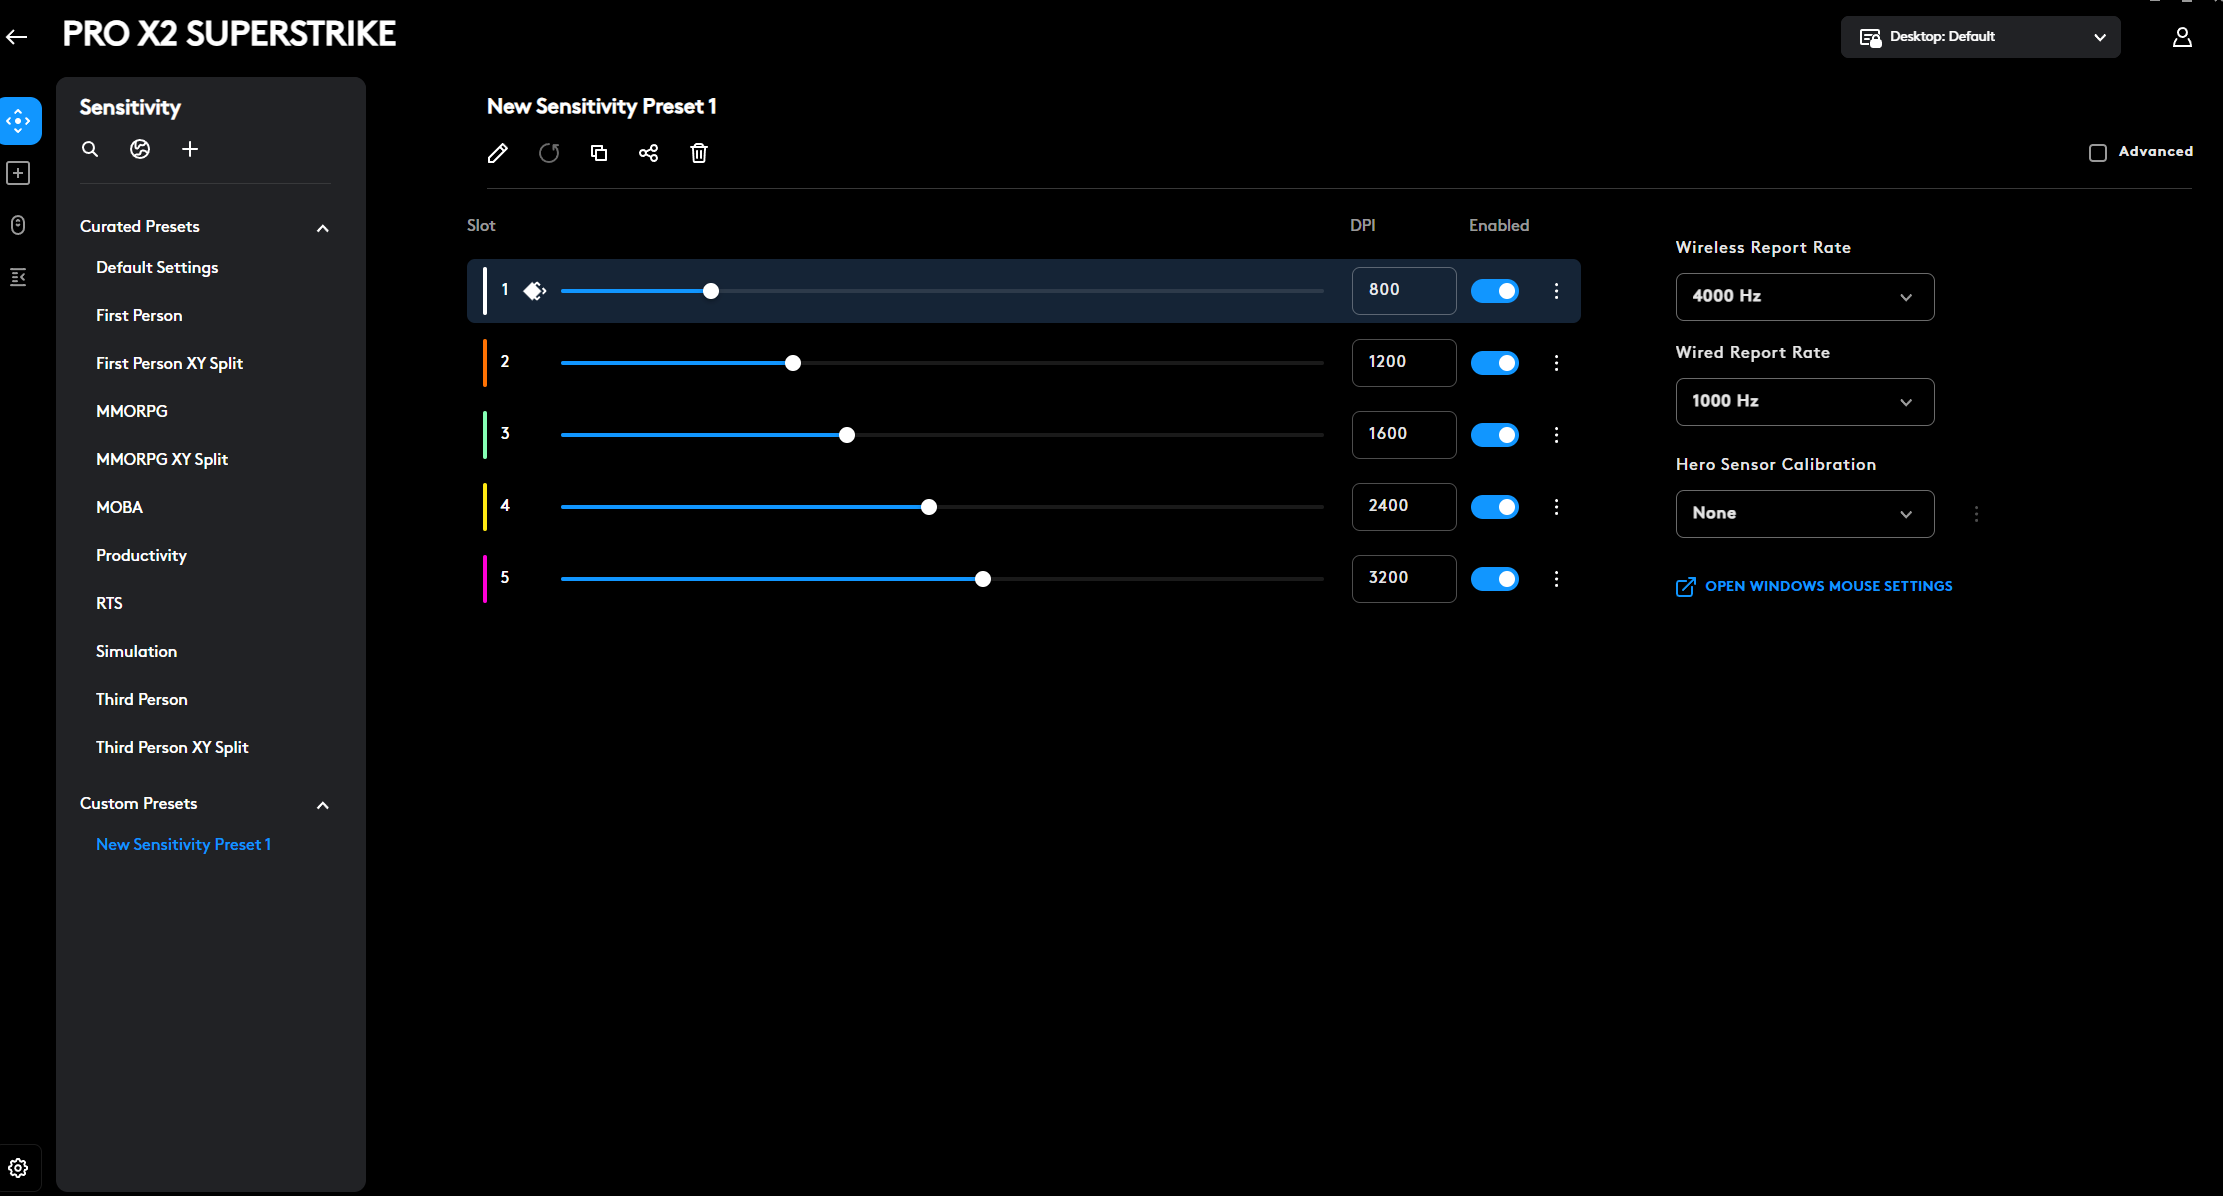
DPI stands for Dots Per Inch and it basically determines how sensitive your mouse is. Contrary to popular belief, a higher DPI isn’t better. Over 90% of our analyzed pro gamers are using a DPI between 400 and 1600, and pretty much not a single professional is using anything over 3200. We recommend going for either 800 or 1600, as this will make your mouse usable for regular browsing in case you decide to use just one DPI setting.
Logitech G HUB allows you to set different DPI levels, and it even allows you to use different DPI settings depending on which game you’re playing. This is a cool option to have for those who want to use it, but we strongly recommend going for one DPI value and using that for everything. You can always play around with the game’s specific sensitivity setting in case you want to use higher sensitivities in certain games.
TIP: it’s a good idea to just drag any DPI levels that you’re not going to use off of the DPI slider. You can do so by simply dragging it up and then releasing it. If you only want to use one DPI setting, just drag off all of the other settings. You can also use backspace to delete a selected DPI setting.
Report Rate (Polling Rate)
The polling rate determines how often the mouse updates its position. At a polling rate of 500Hz, your mouse updates its position 500 times per second. At 1000Hz, it does so a thousand times per second. It’s obvious that higher polling rates result in a snappier and more responsive experience, but it also drastically reduces battery life.
Modern gaming mice can go way higher than the 1000Hz that was traditionally the maximum polling rate, but the advantages of higher polling rates aren’t as obvious. You need a very beefy PC and high refresh rate monitor before you even notice the difference, for starters.
With that said, going for higher polling rates also doesn’t hurt. Your battery life lowers, but that’s it. As such, we recommend setting your polling rate to 4000Hz (if available) for a good mix between battery life and performance.
You can read more about how polling rates affect performance in our dedicated article on high polling rate mice.
HITS Settings
One of Logitech’s latest innovations is the Haptic Inductive Trigger System. This allows you to set the actuation point and click feedback of your mouse clicks to different levels, allowing for further customization. There is no right or wrong here, as this is very much down to personal preference.
We recommend starting at an actuation level of 1 and playing with it in practice mode. If this is too sensitive, lower it by one step. Repeat that process until you find something you’re comfortable with. Then, do the same for the haptic feedback.
You can also share or import HITS codes to try out the settings of your favorite pros.

Best Logitech G HUB Keyboard Settings
Keyboards come in two forms nowadays. You have regular mechanical keyboards, and analog keyboards with customizable switches. Logitech sells both. We absolutely recommend analog keyboards for gaming.
Lighting
Logitech keyboards feature RGB lighting that you can customize to a great extent. For purely competitive reasons, we could suggest going for a lighting profile that’s not too intricate (and thus distracting) but in reality you can go with whatever you want here, as you’ll be focusing on your screen when gaming anyway.
Assignments
In assignments, you can rebind the keys of your keyboard as well as create macros and the likes. This can be handy for certain games where you want to bind a series of actions to one key (do note that many tournaments do not allow for the usage of macros though: always make sure to confirm that these things are allowed) and it’s also incredibly useful for productivity purposes.
As with mice macros, all of this comes down to personal preferences, so there isn’t really any ‘best macro setup’ or something like that.
Analog Keyboards
With analog keyboards, there isn’t one ‘best profile’. It all comes down to your personal playing style, and even the game you’re playing.
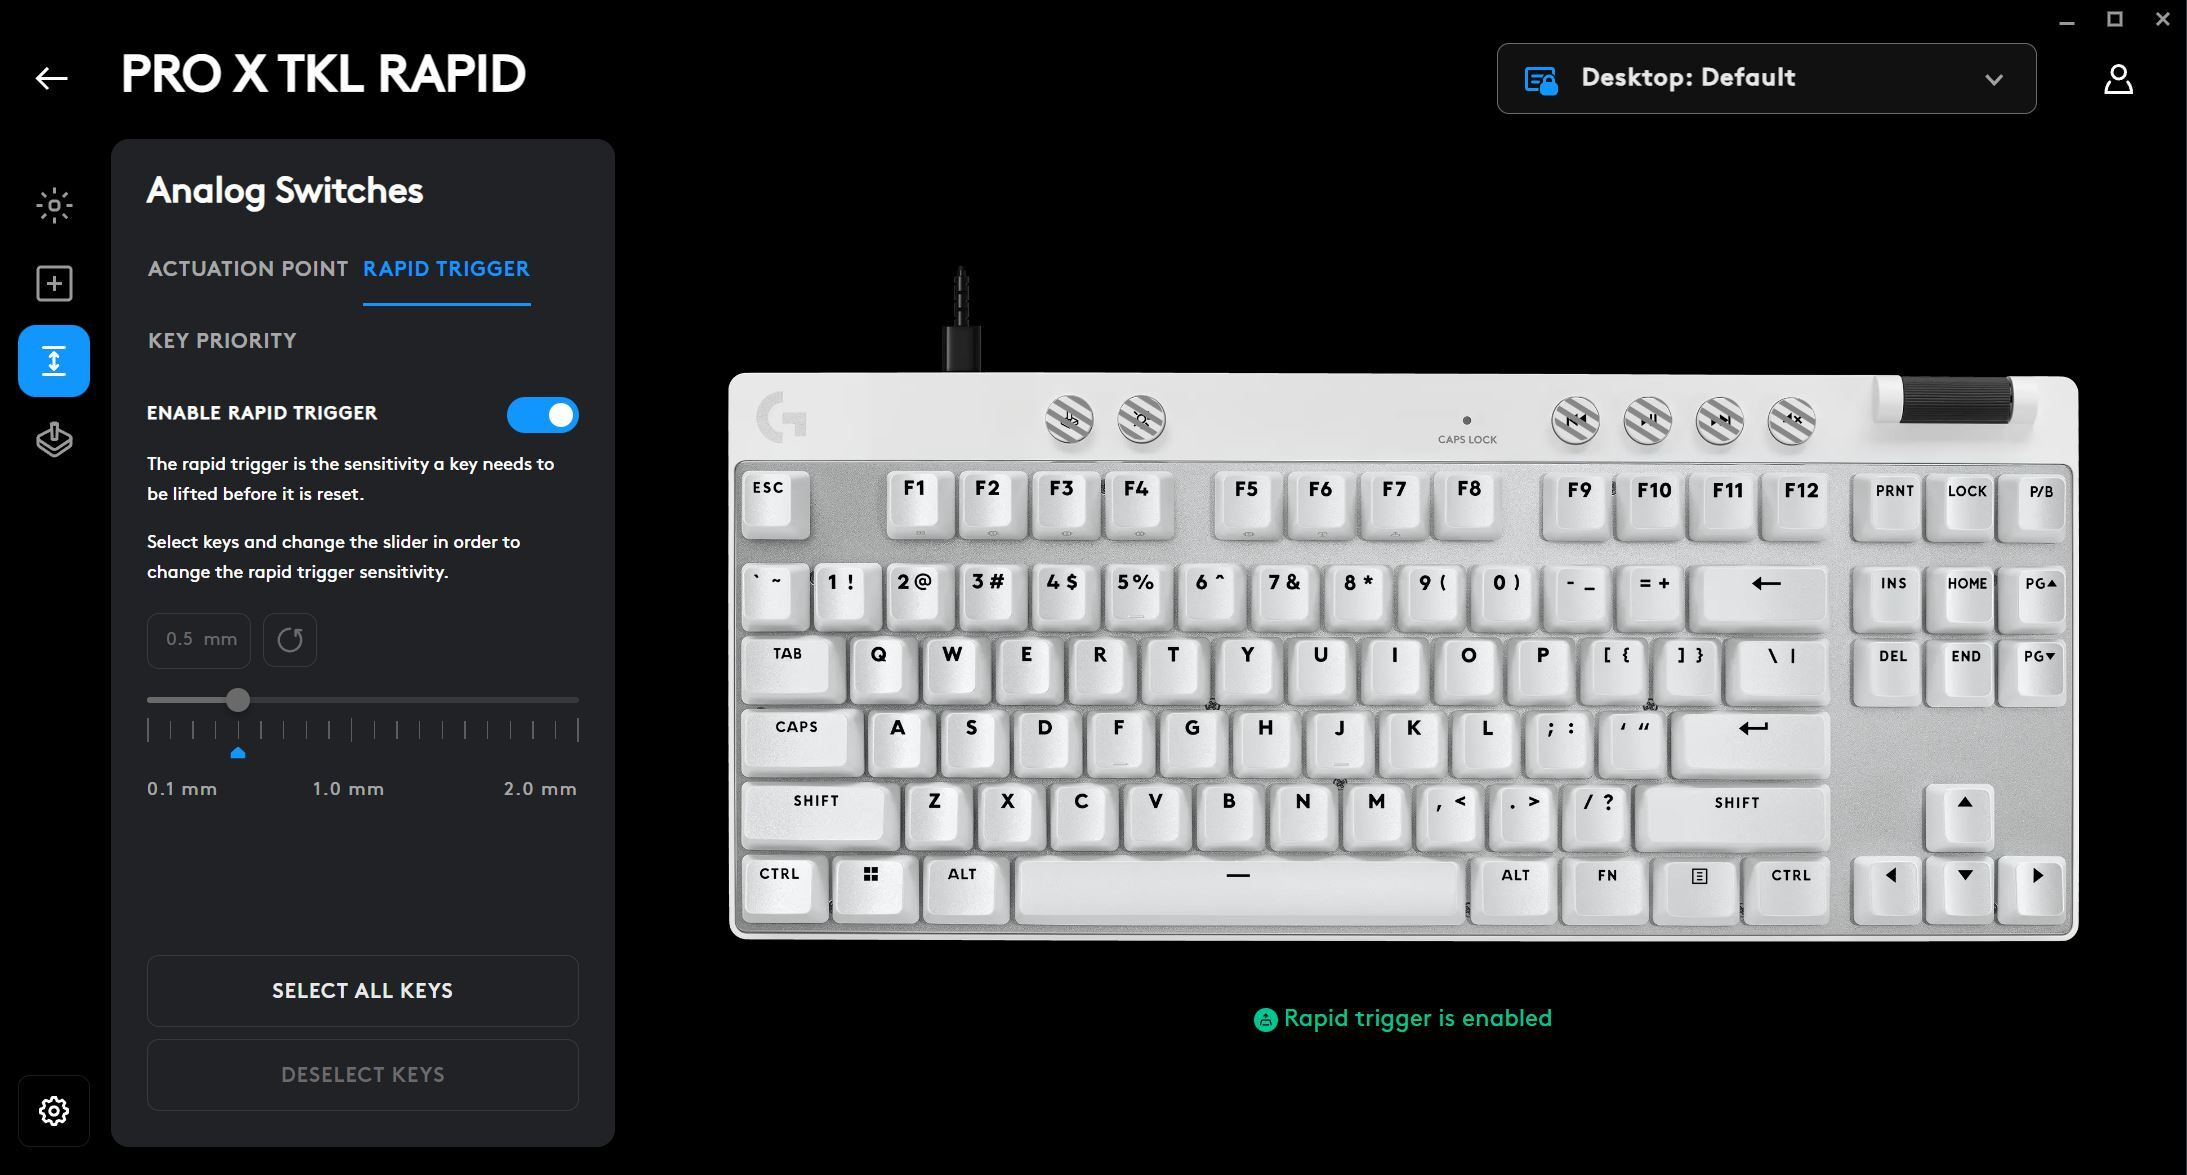
As a ‘quickstart option’, we recommend turning on Rapid Trigger, setting your movement keys (WASD for most) to an actuation of 0.2-0.4mm, and setting your other keys to 0.4-0.8mm. This allows you to have super responsive movement while getting a bit more leeway with the other keys to prevent fat-fingering.
With that said, the whole point of having analog switches is being able to customize your keyboard to your exact playing style, so we recommend spending some time in practice maps or quickplay matches to dial in the board to your preferences.
Best Logitech G HUB Headset Settings
Sound is often neglected by the more casual gaming audience, but that’s a critical mistake to make, as a good sound profile can really help you win fights and, as a consequence, games.
Acoustics
When it comes to the volume of your headset, there’s no one guideline. Yes, when the volume is at maximum you’ll increase the chances of hearing very quiet sound cues such as an enemy approaching in the distance, but always make sure to keep your headset at comfortable sound levels. If you’re in a quiet environment with no outside noises, there’s no reason to set your headset at ear-rupturing volume levels.
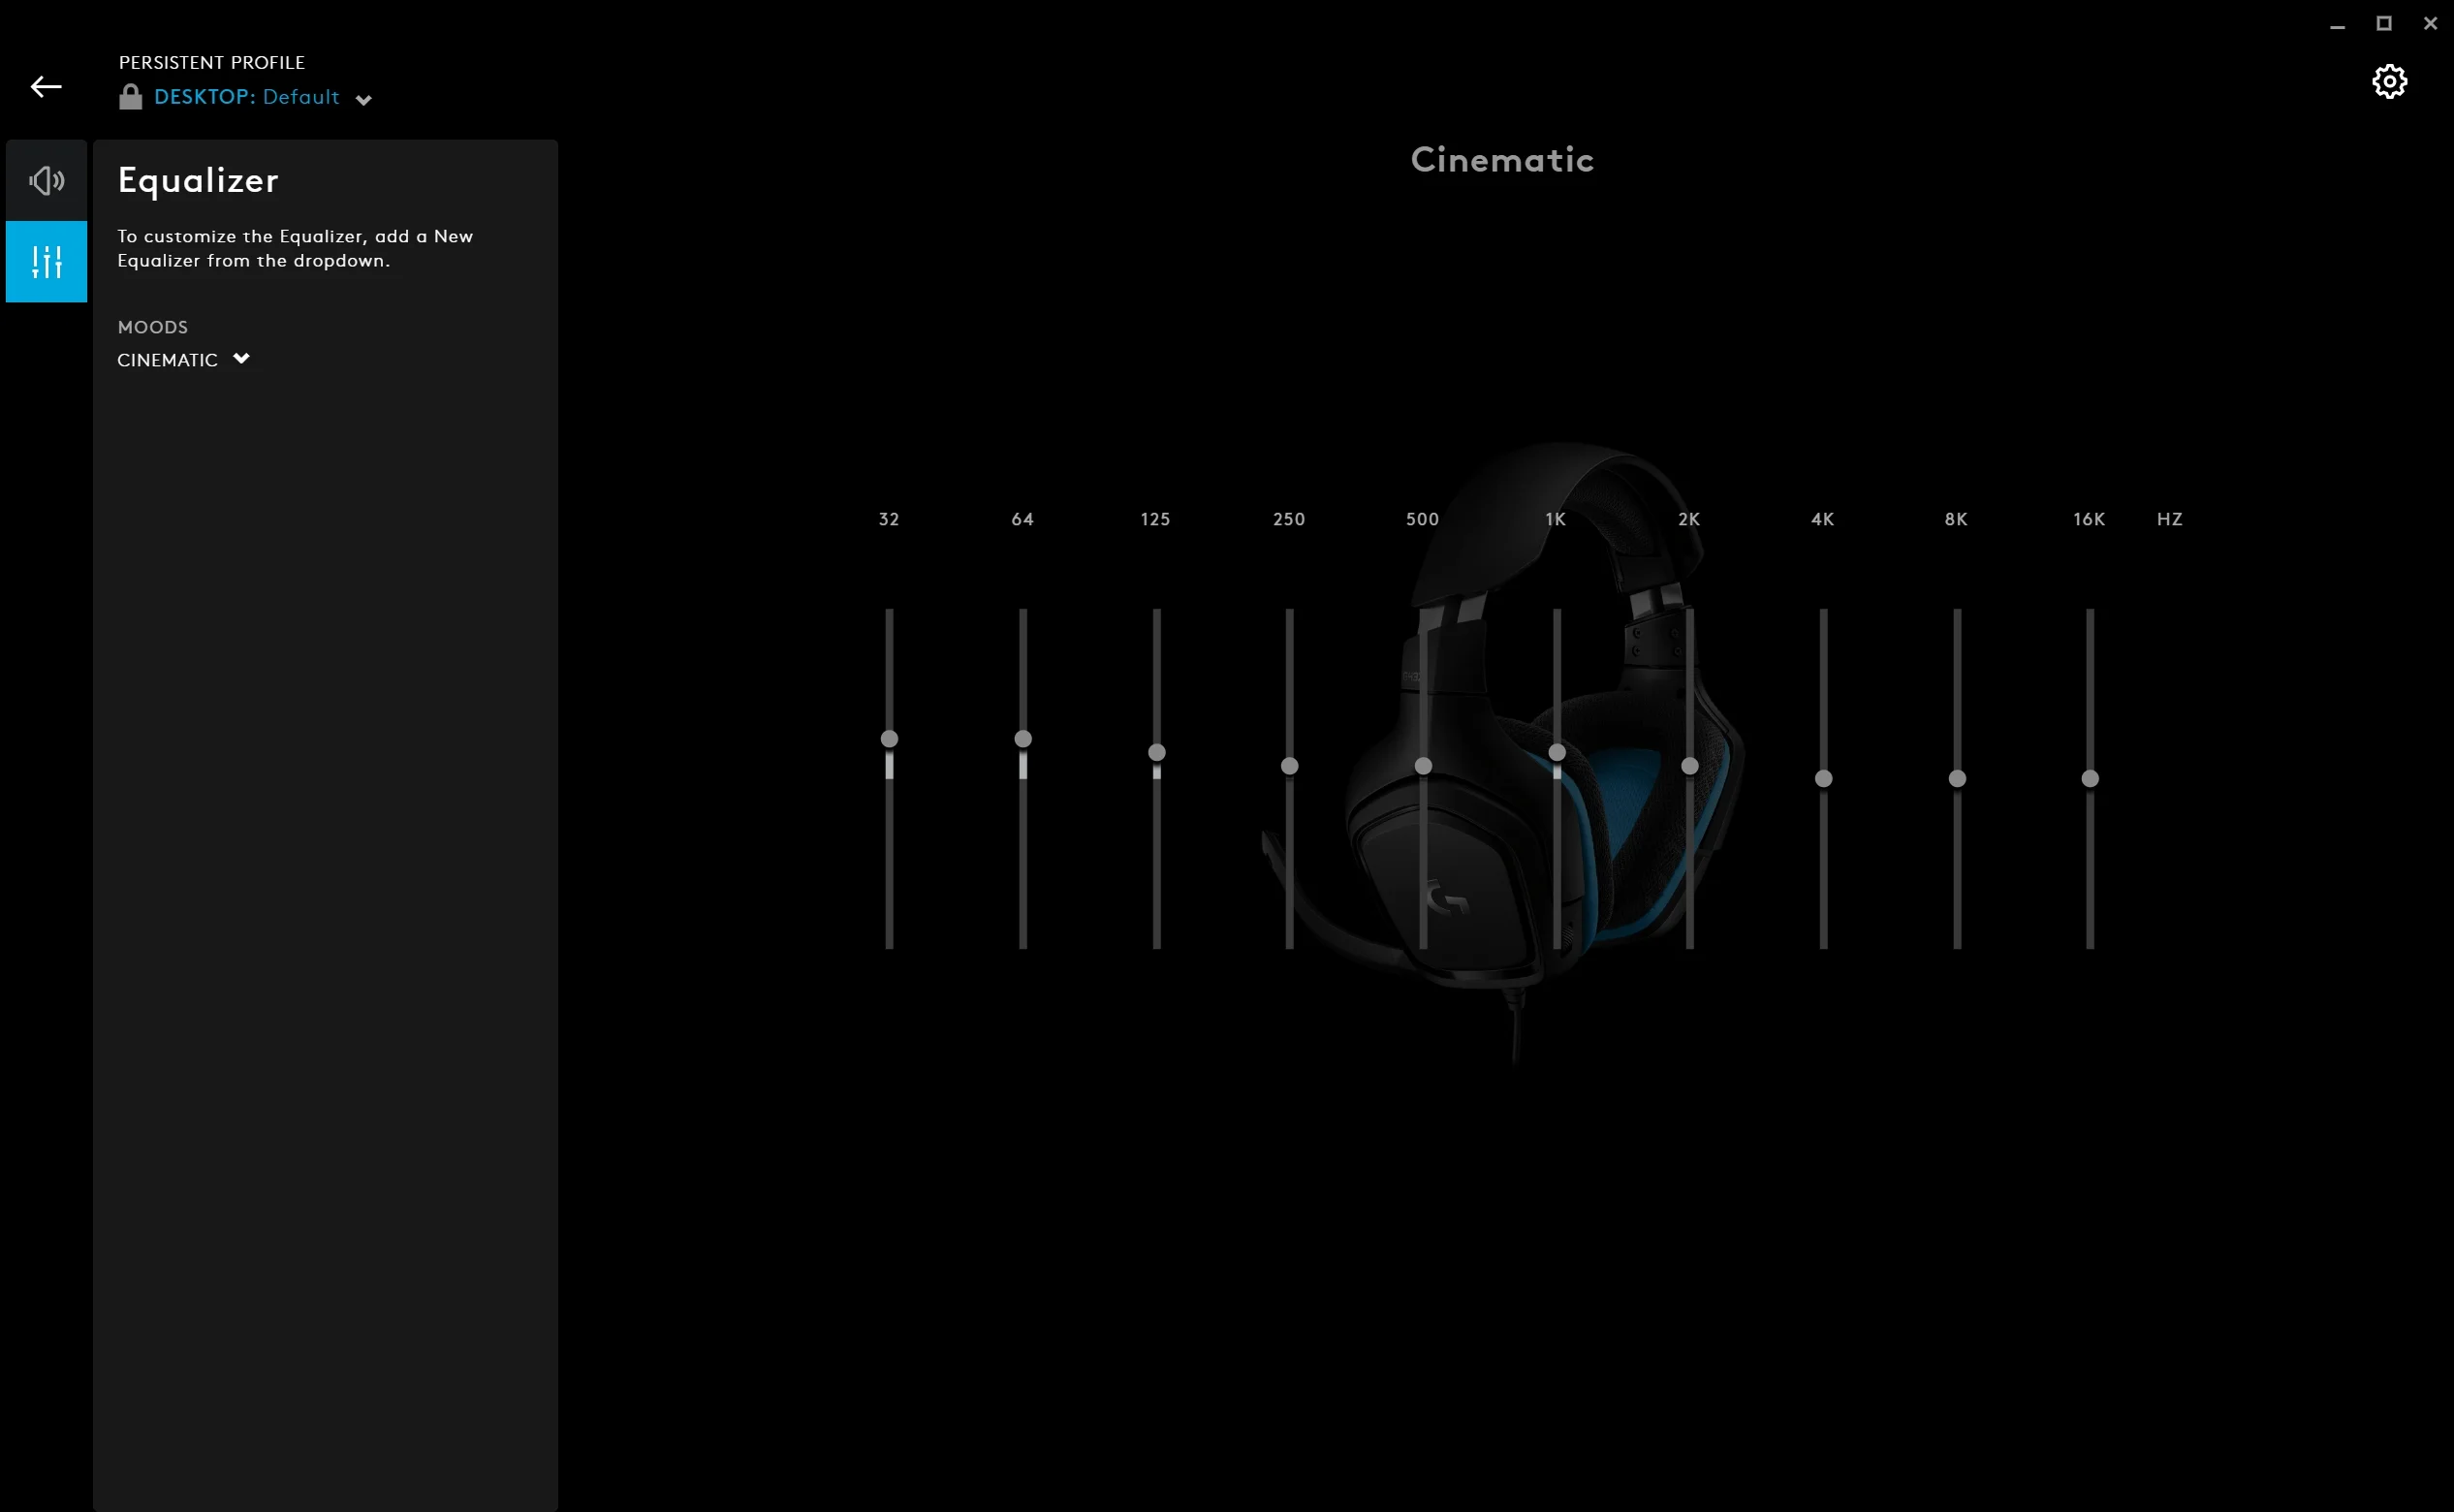
As far as the overall sound profile goes: for competitive gaming, you will definitely want a sound profile that goes easy on the bass. Bombastic bass sounds can feel great for when you’re watching a movie or playing a single player game, but the most important sounds for a competitive gamer (footsteps, reload sounds, …) live in the mid to high register of sounds. In the interest of boosting those important sounds, we recommend turning down the bass response.
In case you’re not very familiar with sound and sound equalizers, Logitech has a couple of presets that are ready to go. For competitive shooter gaming, we recommend going with the First Person Shooter (FPS) preset, and work from there. This preset doesn’t sound as good for content consumption, but you can very easily switch to a more cinematic (there’s literally a preset called ‘Cinematic’) experience if you want to. If you do decide to tweak the FPS preset, make sure to not raise the bass levels too high.
Surround Sound
Most Logitech gaming headsets come with some form of surround sound, and while that can be cool for single player games or content consumption, we strongly recommend you to keep the surround sound off when playing competitively.
In short: most games have very specific sound engines, and layering virtual surround sound (‘virtual’ because you obviously don’t have a full set of speakers in a headset) processing on top of that can cause the sound positioning to go wrong. You really don’t want to be caught looking left when an enemy was approaching in your back, for example, so for competitive gaming you should leave all forms of virtual surround sound off.
Best Logitech G HUB Microphone Settings
As you may or may not know, Logitech has partnered with Blue for their gaming headsets. Blue is a company that makes microphones, known for their mics such as the Yeti and the Snowball, and their VO!CE technology can be used with Logitech headsets. You don’t need to download any additional software for this as it’s all available inside G HUB.
Blue VO!CE
Disclaimer
Every person has a different voice, so there is no one ‘perfect Blue VO!CE setup’. A person with a very deep and raspy voice will require different EQ settings than a person with a high voice, so you’ll probably want to experiment with these settings a little bit until you find something that matches your voice.
Blue VO!CE has a ton of options to tune the sound that your microphone puts out, and these options really do make a difference. If you’re not someone who is into audio it can be quite confusing to see all of these different options and settings though, and luckily there are presets available. Some of these presets are a bit more gimmicky than others (imitating old-timey radio voices and so on) but the Broadcaster 1 and Broadcaster 2 presets seem to work pretty fantastically for the majority of people.
If you click through to the advanced controls, you’ll find a bunch of in-depth settings such as a high-pass filter, noise reduction, and so on. We’ll give you a basic explanation on what these do so you can tweak the sound to your liking. You can even change the parameters of these individual options for ultimate control, but then you’re really diving into audio engineer territory. Since the presets are already very good and the base level customization suffices to get 99% close to a perfect microphone sound for your voice, we don’t recommend going into these very in-depth settings unless you have a lot of time and/or you know what you’re doing.

High Pass Filter
A high pass filter basically blocks out sounds that are in the lower register. This is handy for blocking out air conditioning fans or other low and humming noises. You can select the precise frequency cutoff. We recommend turning this on if you have consistent, droning sounds in your playing area.
Noise Reduction
This is technology that removes consistent sounds such as rain, the sound of a highway in the distance, and so on. Note that this won’t eliminate sudden noises such as the screaming of a baby, but if you live in a noisy environment then it can be a good idea to enable this.
Expander/Gate
This is a noise gate, and it removes unwanted sounds (people speaking, children playing, a TV playing, …) when you’re not speaking. To put it simply: this will (sort of) mute your mic’s output whenever you’re not speaking and only activate it when you are speaking. We recommend activating this if you’re someone who is playing with friends on Discord or any other chat program with an open mic. Play around with it a bit until you find the level that activates it only when you are speaking. Your teammates will thank you.
De-Esser
A de-esser aims to eliminate sibilant (‘hissing’) sounds, such as the ones you make when you say ‘s’, ‘z’, and so on. In essence this does the same as what a pop filter does for plosives; it doesn’t remove those sounds (i.e. you can still say the letter ‘s’ and so on) but it makes them less harsh. We recommend turning this on.
Compression
A compressor reduces the dynamic range of an audio signal and aims to keep your voice at a consistent level. This means that screaming won’t be (much) louder than normal talking. This makes for a more consistent and pleasant listening experience. We recommend turning this on, doubly so if you’re someone who tends to get loud.
Limiter
A limiter ensures that an audio signal doesn’t exceed a certain level. This is handy to ensure that you’re not giving your teammates jumpscares if you scream after getting killed or what not.
Logitech Lightsync
If you’ve got multiple Logitech G products, you’ll notice that you can sync the lighting of one product to the other ones that you have activated. This is a handy way to make sure that all of your peripherals are in sync in case you want to create a specific atmosphere.
Conclusion
There are a ton of settings that you can configure in Logitech’s software, and therefore it can be hard to find the best Logitech G HUB settings if you’re not all too familiar with what all of these settings mean. Luckily, most of these settings are rather straightforward once you know a bit about what they do, so hopefully this guide has helped you with configuring your Logitech G peripherals.
Do pro players even use GHUB?