How to mod a mouse
With more and more manufacturers producing aftermarket parts (cables, feet, …) modding gaming mice has increased in popularity over the past couple of years. There are two reasons to mod your mouse: to increase the performance (by installing feet that suit your preferences better, for example) or to make it looks unique and get yourself a customized looking mouse (by swapping or painting the shell, …) and of course one mod (a paracord, for example) can also do both.
Messing with an often expensive piece of electronic equipment can be quite daunting, and opening up the shell of a mouse usually voids warranty so it’s understandable that most people prefer not to touch their rodents but the reality is that most basic mods are extremely easy. Changing up the feet, for example, doesn’t even require you to open up the mouse and is a task that takes all of five seconds. Installing a paracord does require you to open the mouse but is actually a very easy mod which requires next to know knowledge of circuitry or electronics.
In this guide we’ll give you a brief overview on how to do these basic mods so that it hopefully encourages you to experiment with it yourself. You’d be surprised at the results!
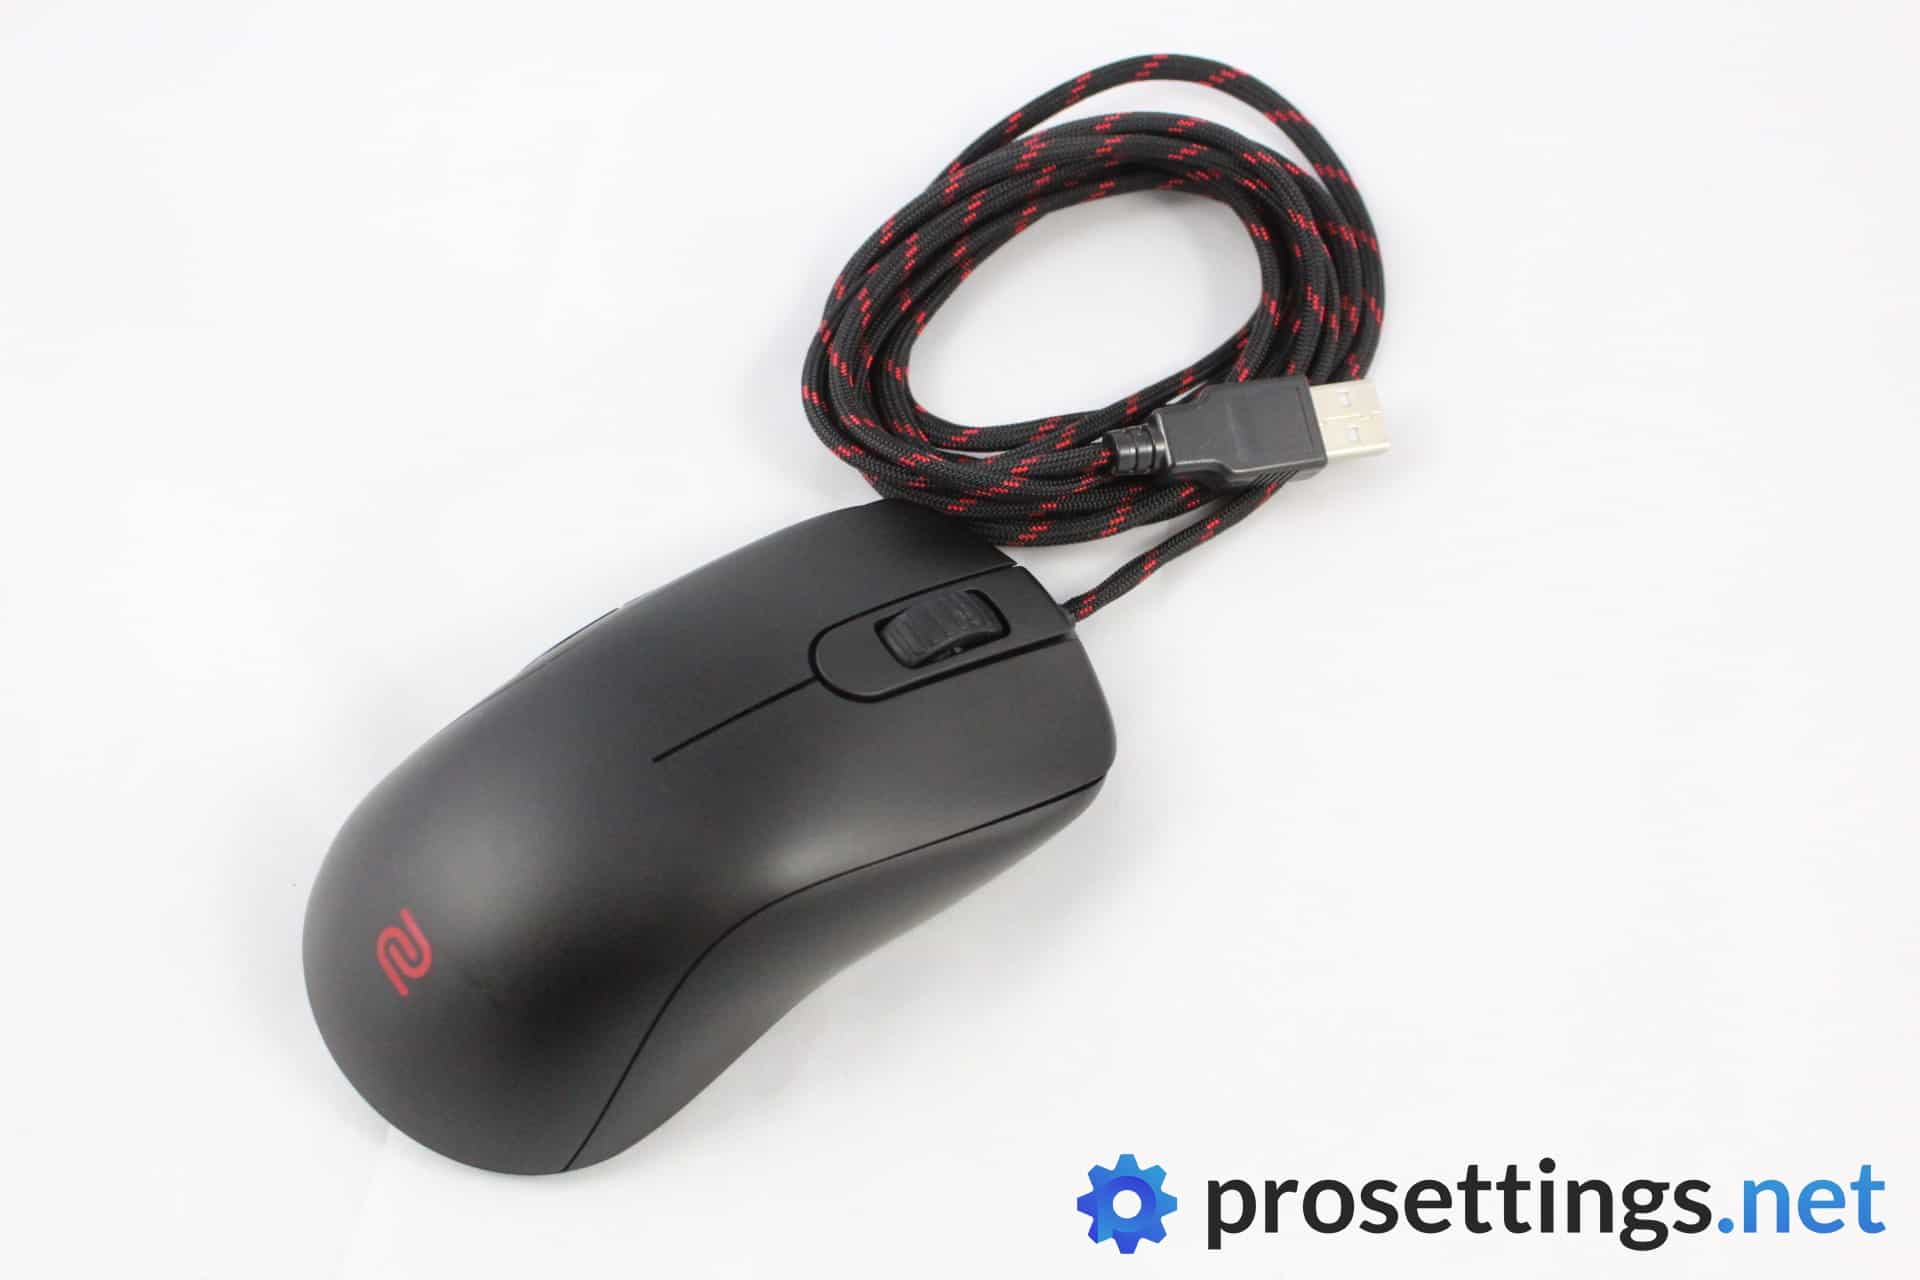
For this guide we’re using one of our favorite mouse shapes: the Zowie S1. We’re using the included spare feet and a third party paracord cable but of course you can also use third party feet.
How to swap mouse feet
There are a lot of reason to swap mouse feet. Some people prefer to do it straight off the bat with most mice as they want the fastest aftermarket feet available, but even if you like the stock feet of your mouse (which is the case for the vast majority of people) you might want to switch to a new set after a lot of use since mouse feet can degrade. Luckily this stuff is extremely easy. The only things you need are:
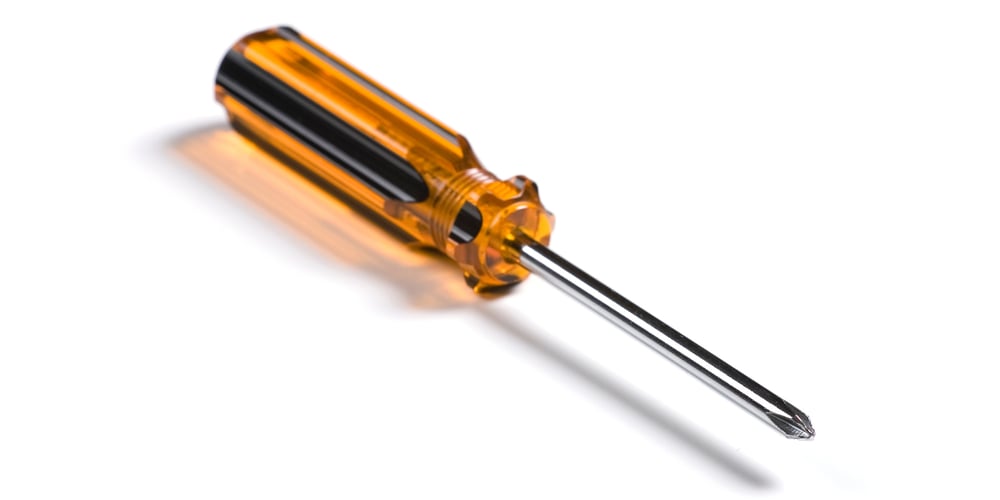
- A small flathead screwdriver (or something with a flat end such as a sturdy knife point)
- Replacement mouse feet
- Optional: alcohol cleaning cloth (or something similar)
- Optional: a hair dryer or heat gun
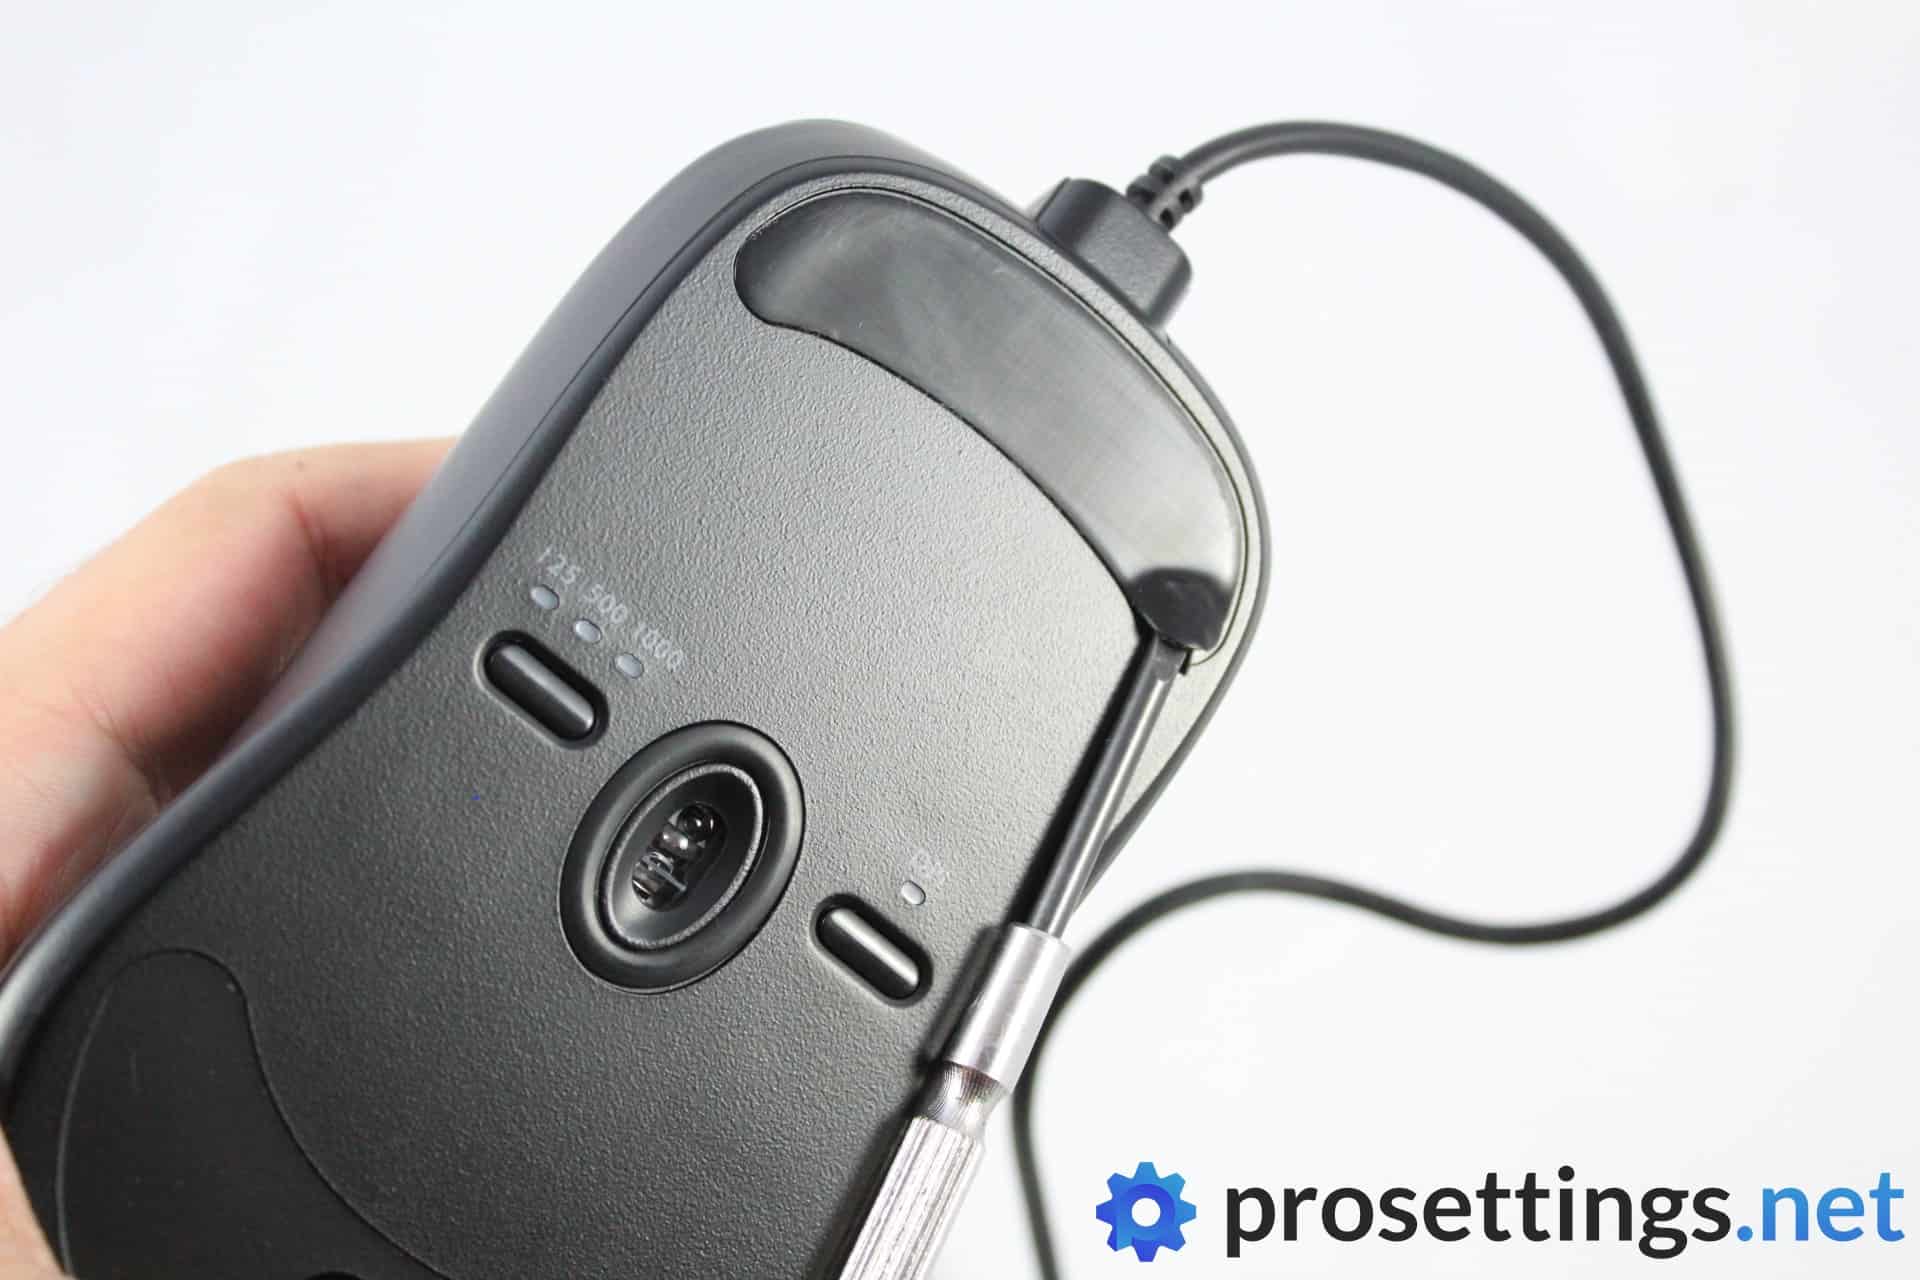
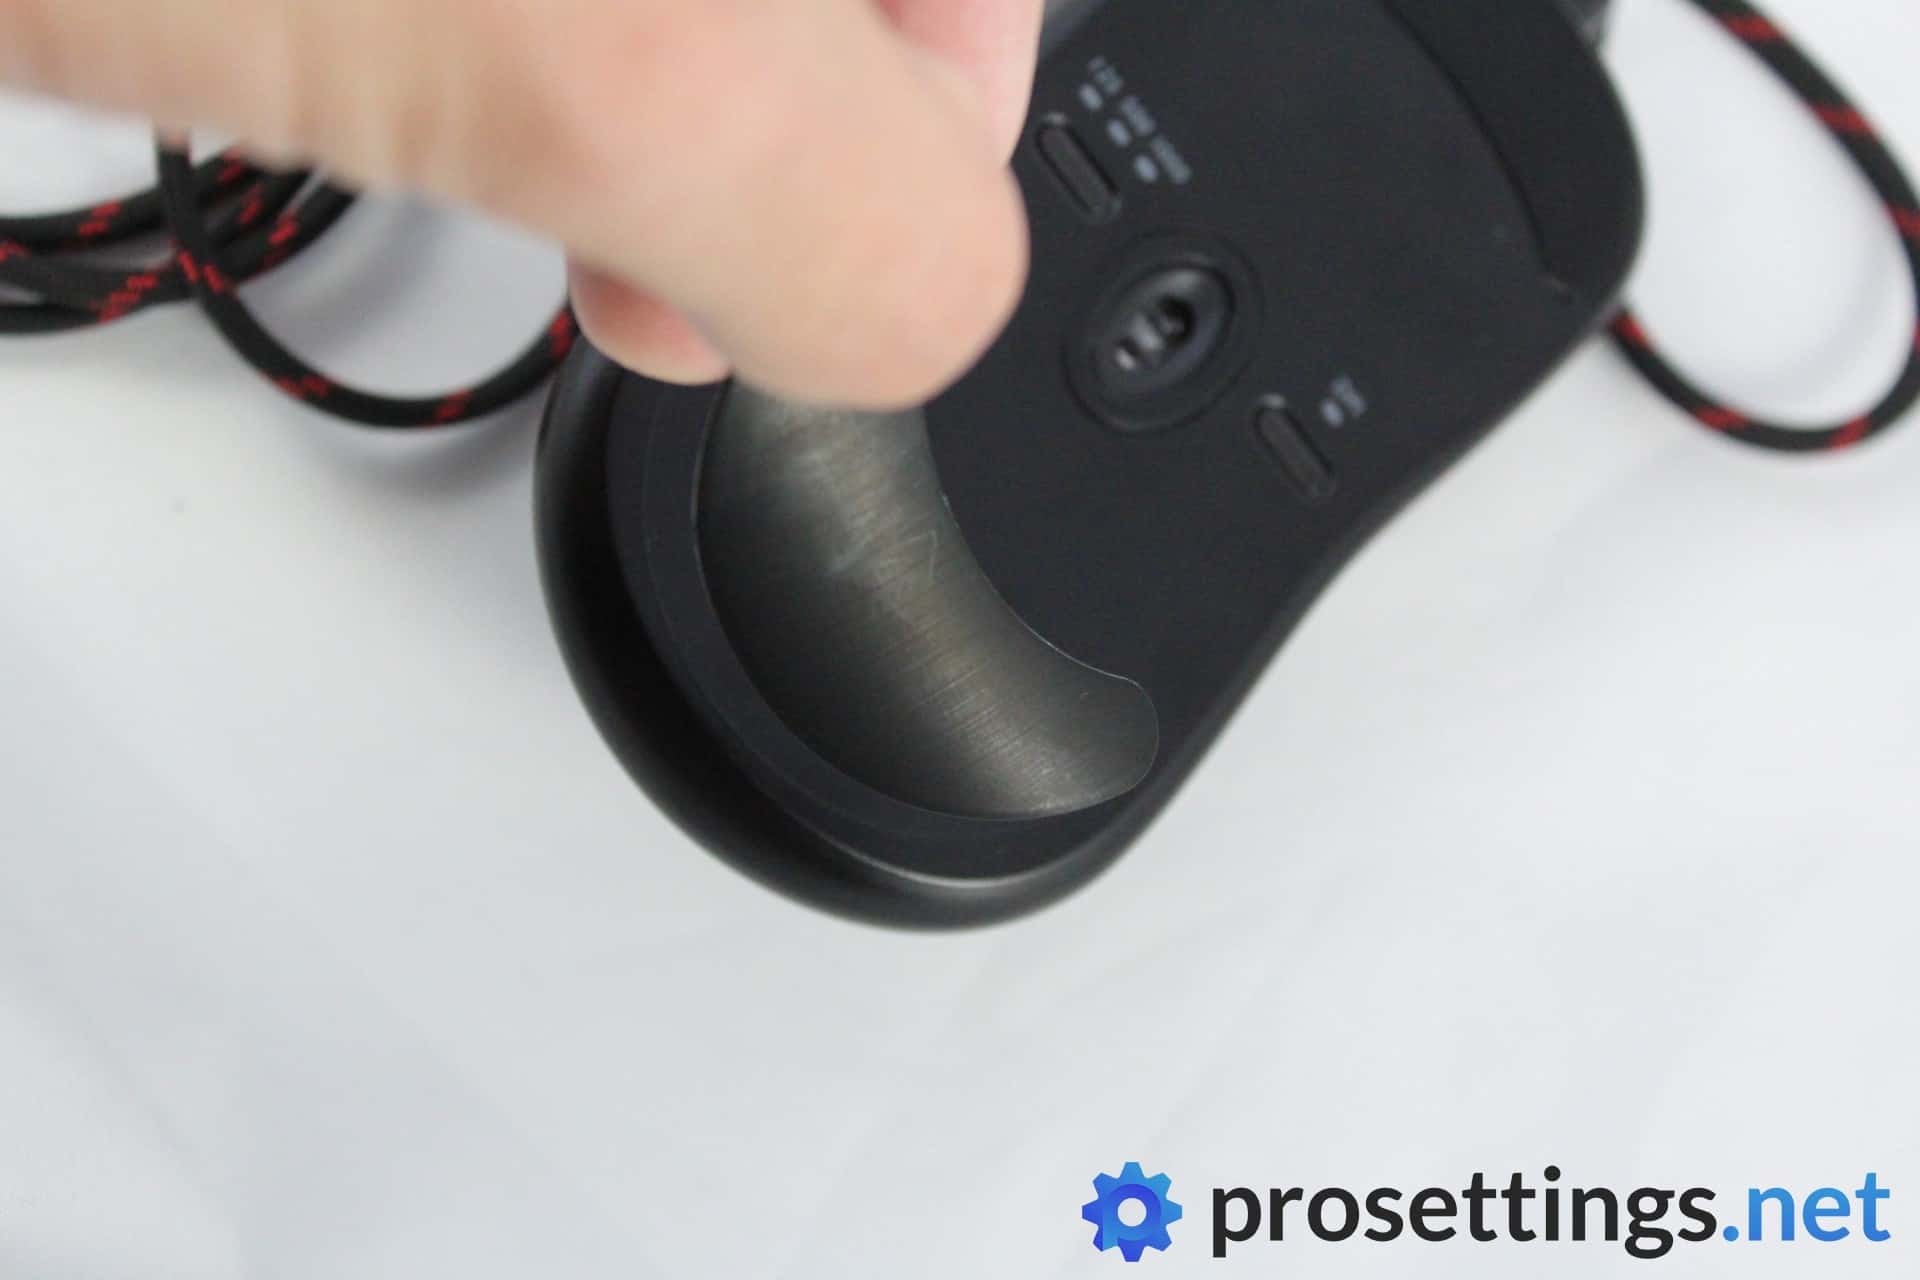
To remove the feet you usually just have to get underneath them using a small flathead screwdriver or something else with a flat and thin end. Be careful when using a knife or something sharp to not hurt yourself or make big scratches on the mouse itself: you want the surfaces to remain pristine.
Some people like to use a hair dryer or heat gun to get the glue underneath the feet to loosen up so if you’re having trouble removing the feet you can always heat them up so they are easier to remove.
Once you get underneath the feet just gently slide your screwdriver underneath until you can grab the skate with your fingers and then gently pull it off. If you’re careful with this and don’t crease the feet you can sometimes reuse them. This is handy to know if you’re removing the feet to open up the shell for a paracord or something.
When you’ve removed all the feet it’s important to make sure that the surface is clean, otherwise you might get inconsistencies with your new skates. If there’s any glue residue left behind just clean it up with a cleaning cloth until the surface is pristine. Make sure to let it dry properly before applying the new feet as well.
Gently align the new feet and then softly press them in place. If you’re sure they fit perfectly place the mouse on a solid surface and press down for a couple of seconds so that all feet are firmly attached to the shell.
That’s all there is to it!
How to swap a mouse cable
Swapping out a mouse cable is a bit more involved and comes with a couple of risks but in the end it’s not a very difficult process. How to precisely swap the cable depends from mouse to mouse but the basic principle remains the same. You basically have to get inside the mouse, remove the stock cable (which is connected with a regular connector, so there’s no need to know how to solder or anything) and replace it with the newer cable.
In this example we’re swapping the stock cable of a Zowie S1 to a color-matching red and black paracord cable. You will need a few things for this operation:
- A flathead screwdriver (to remove the mouse feet; it they’re already removed this isn’t necessary)
- A small crosshead screwdriver
- A lighter, heat gun, or hair dryer
- A paracord
- Replacement mouse feet (unless you’re repurposing the original feet)
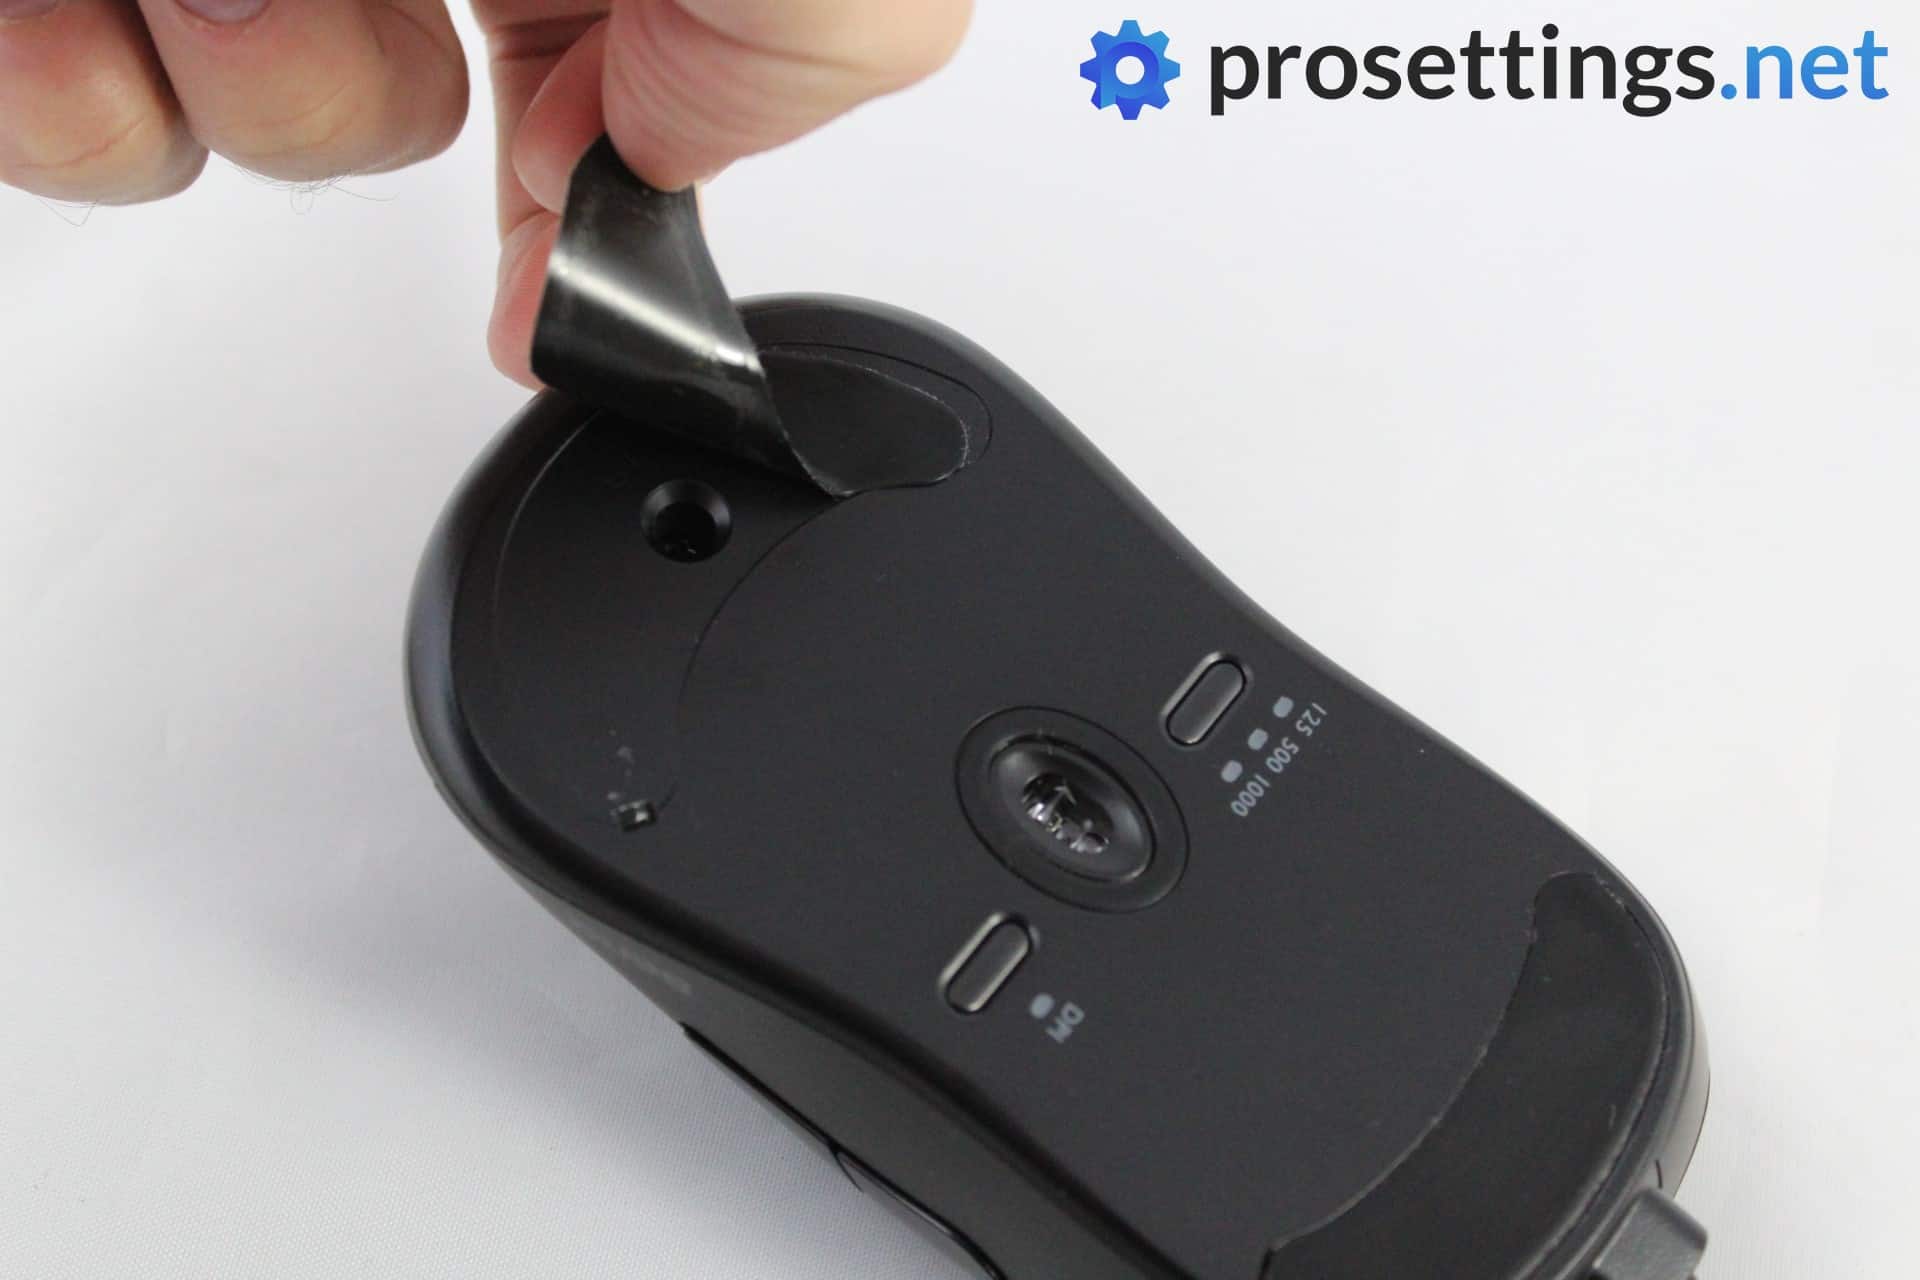
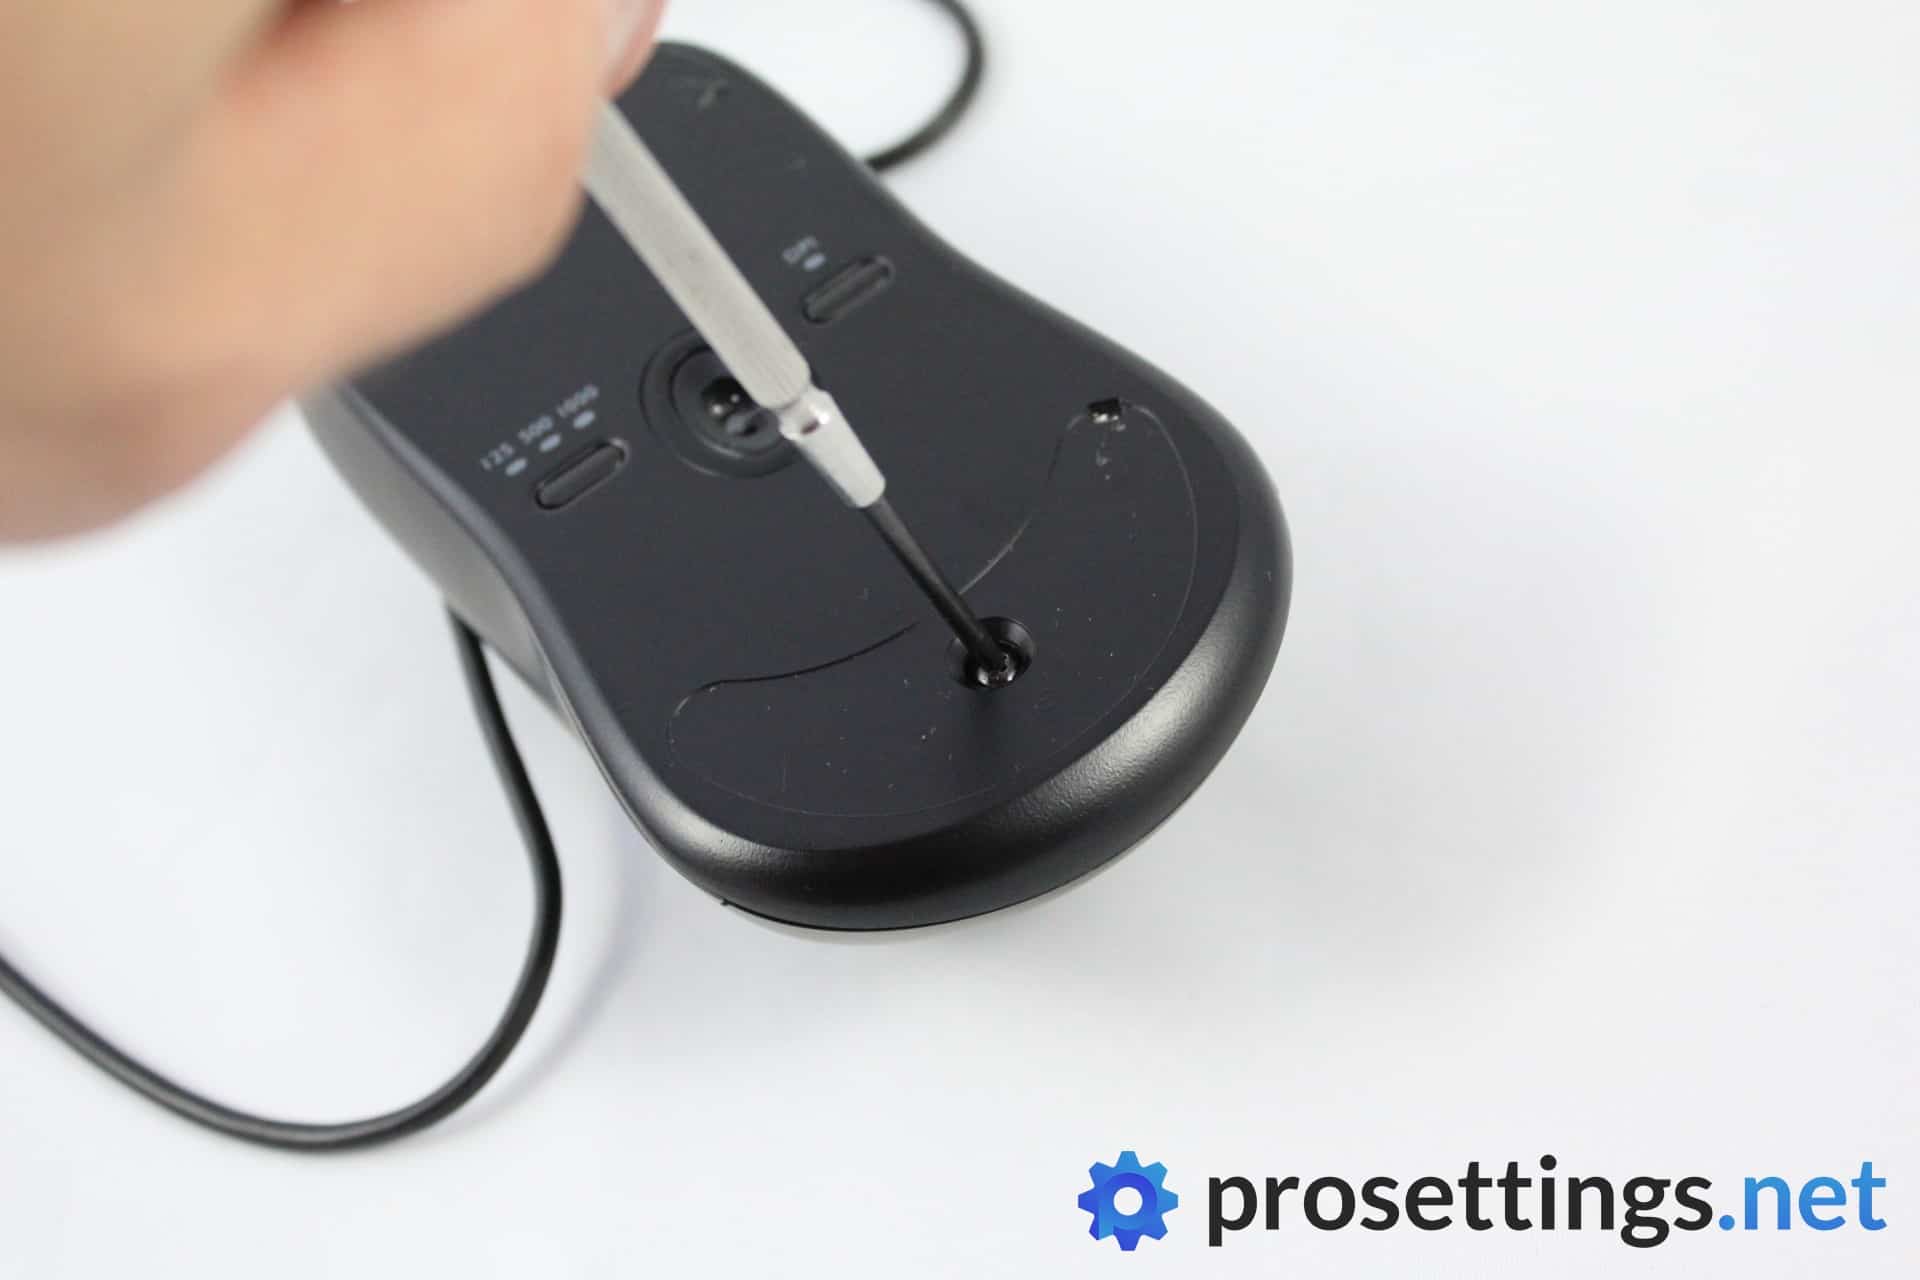
Begin by removing the mouse feet (explained above) if that’s necessary to open the mouse. The vast majority of mice have the screws that hold together both ends of the mouse underneath the skates, which is why we need to remove them.
Once the screws are exposed, remove them using the crosshead screwdriver. Make sure to store them somewhere safe (a small box, a magnetic pad, …) since these are extremely small screws than you can lose track of easily.
When all screws have been removed (on the S1 it’s just the one screw underneath the largest mouse skate) gently separate both parts of the shell. With a lot of mice this will involve some sliding and a bit of force. Make sure to not be too aggressive: you don’t want to damage or sever the cables in the mouse.
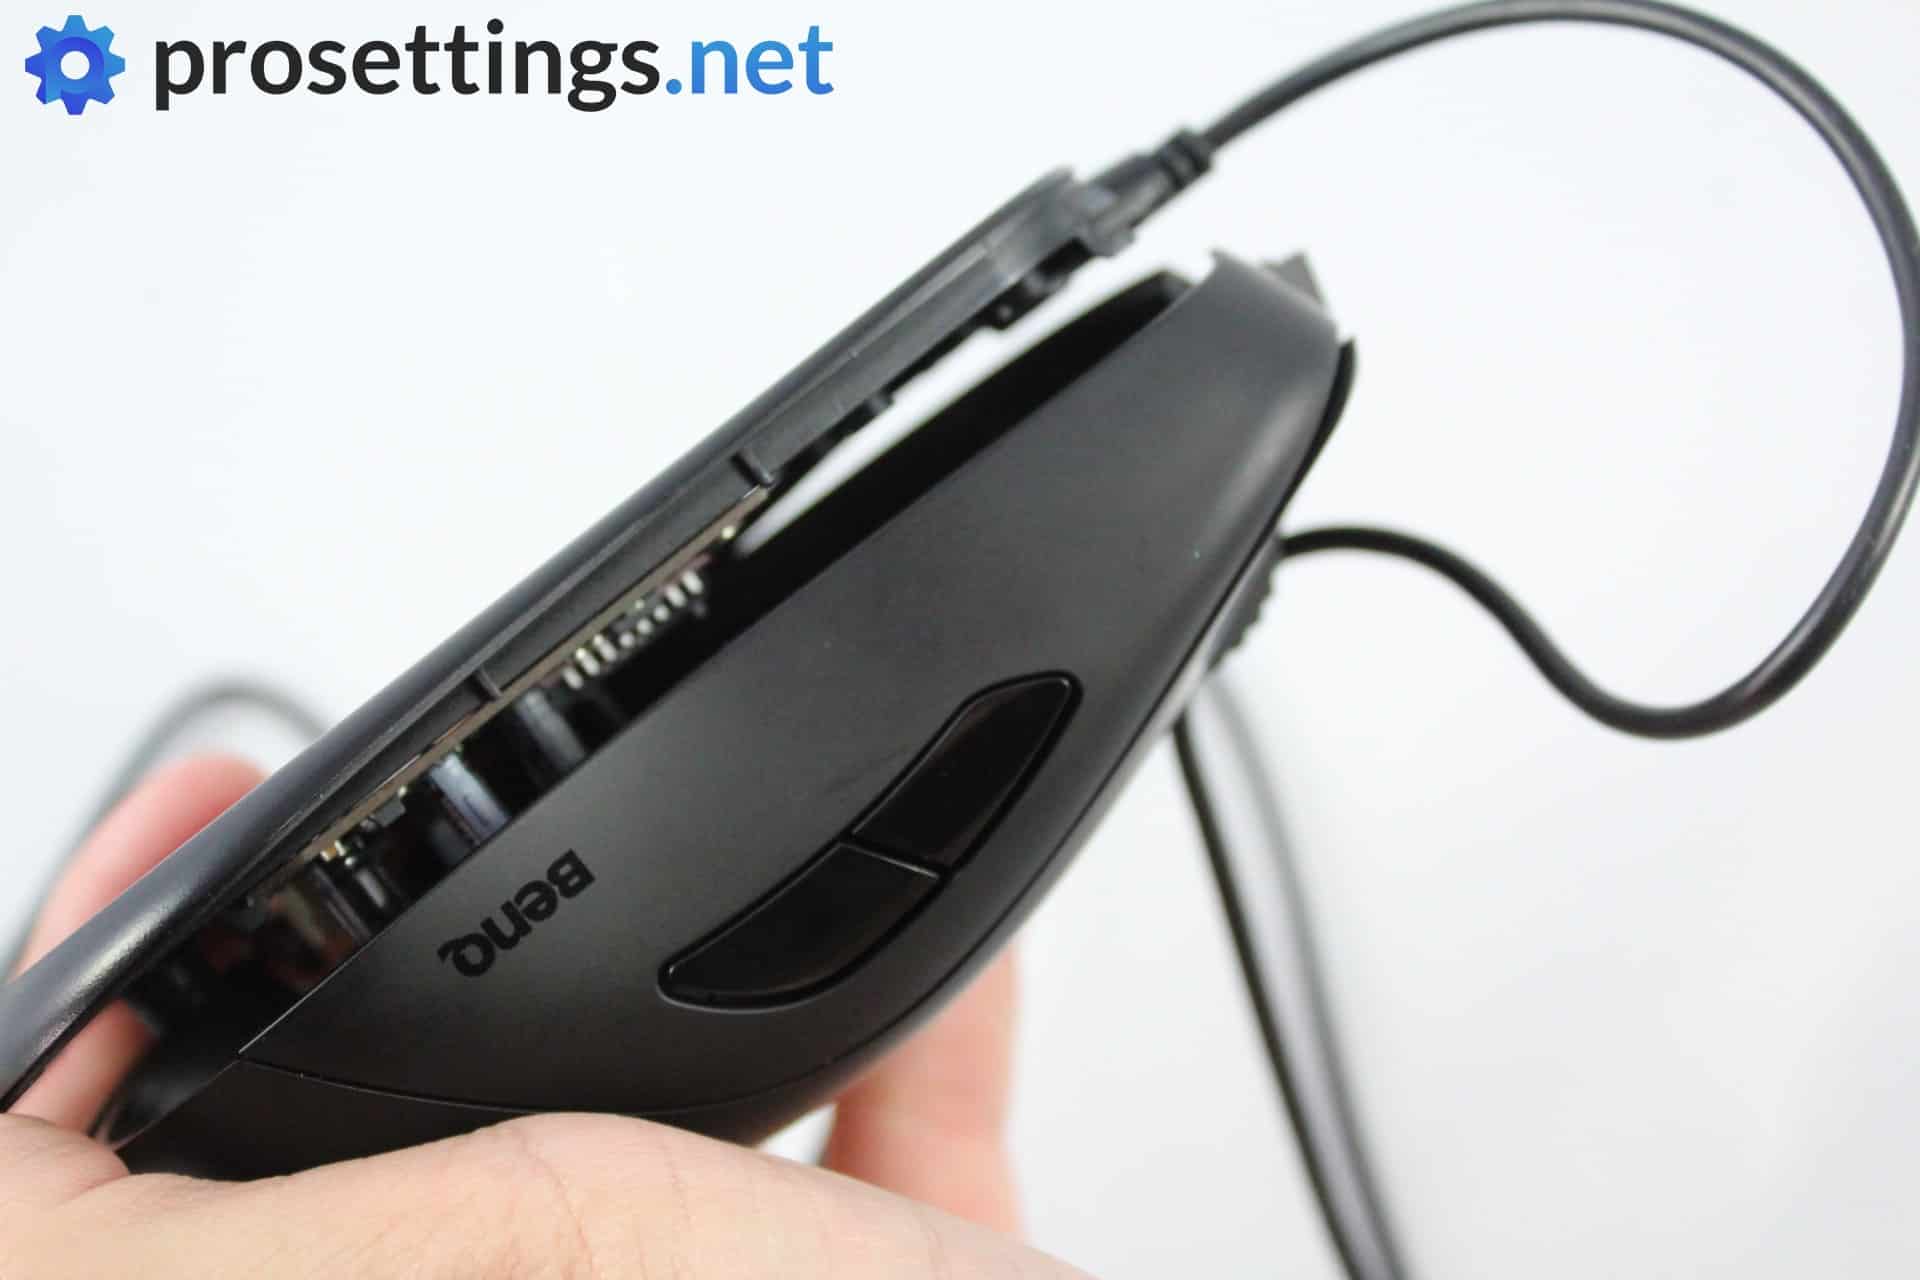
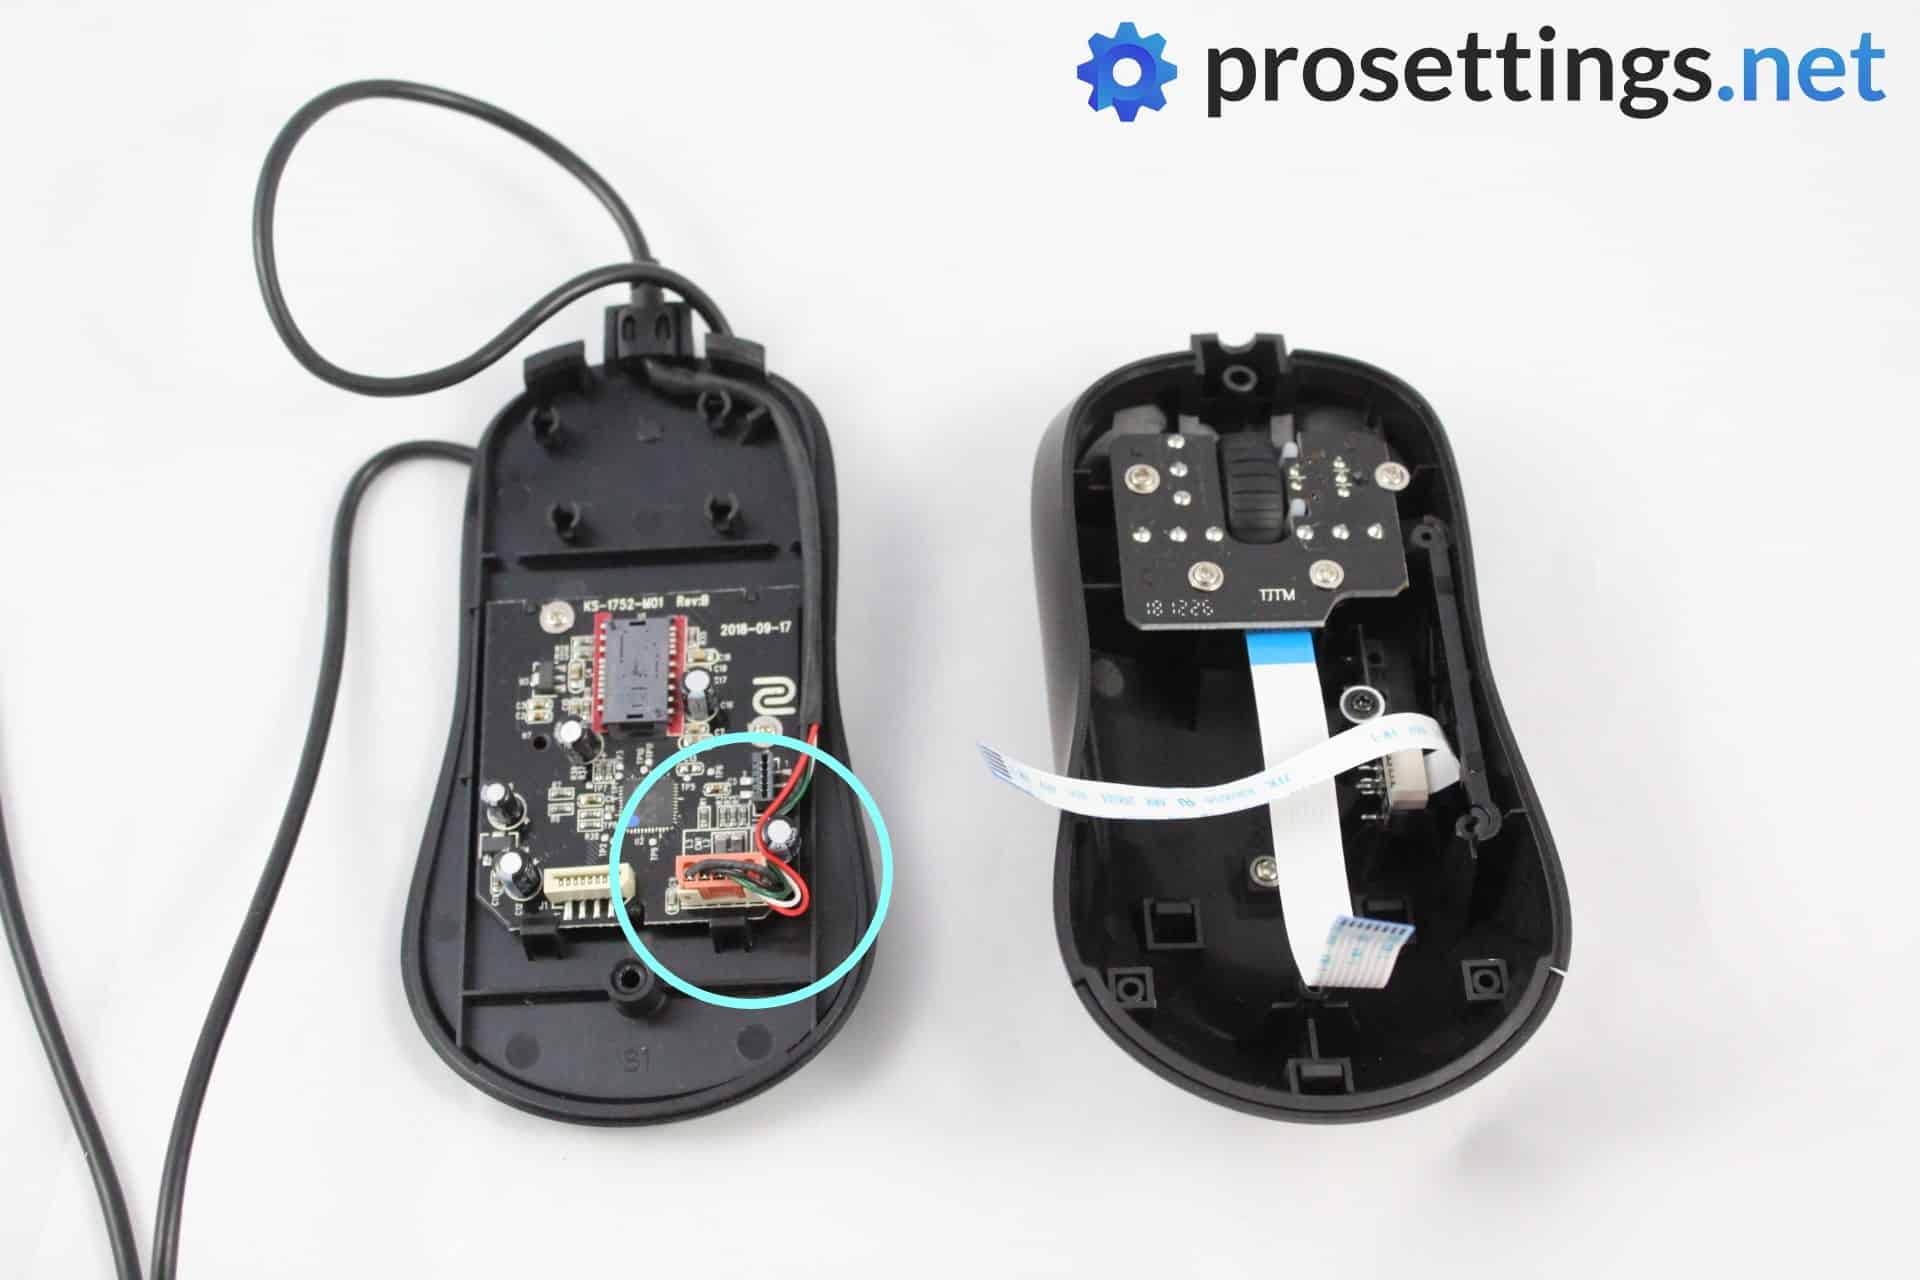
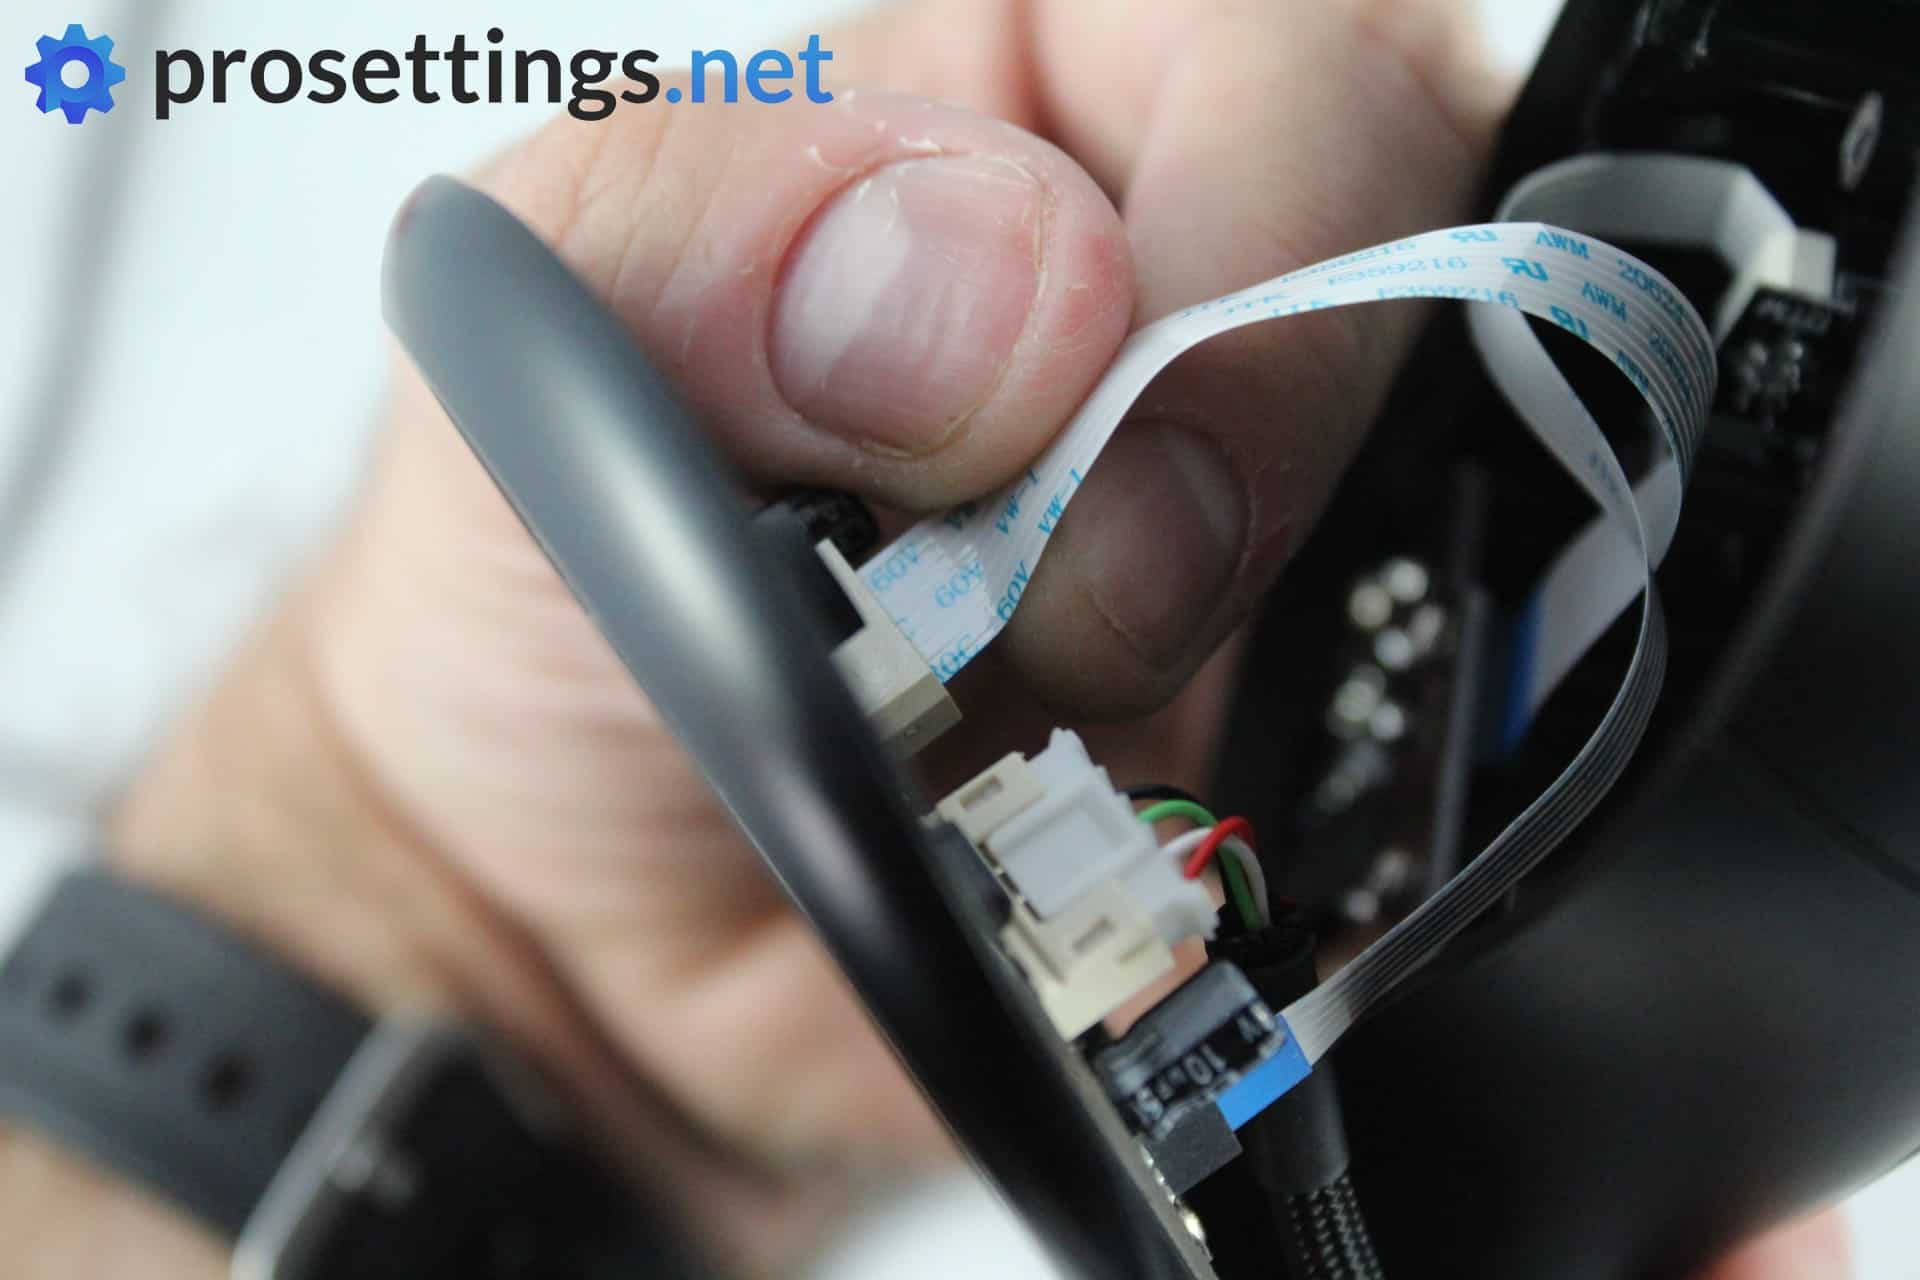
Once the mouse is open, identify the point where the stock cable is connected to the PCB. Usually it’s easier to separate the two halves of the shell to do this, so carefully disconnect the ribbon cables (don’t pull on the cables themselves) so that you can separate both ends of the shell.
Identify the cable, and disconnect it from the PCB. With this Zowie S you can easily get to the cable, with some other mice you might need to temporarily remove other parts of the PCB that are in the way.
If your paracord has a rubber element to place at the end of the cord you should heat shrink it first so that it doesn’t move. To do this, simply expose the rubber element to heat. This can be done with a heat gun or by exposing it to the blue/invisible part of a flame from a lighter. Do not leave the cord in the flame/exposed to the heat for too long. It will quickly start shrinking once it’s exposed to heat so this shouldn’t take long.
Now you’re ready to test fit the cable. Place the cable just like the old cable was placed (use the same cable routes etc., otherwise you might hinder the scroll wheel or something like that with the cable) and align the unused rubber with the spot where the cable exits the shell. This isn’t always necessary if the cable has been custom fitted beforehand.
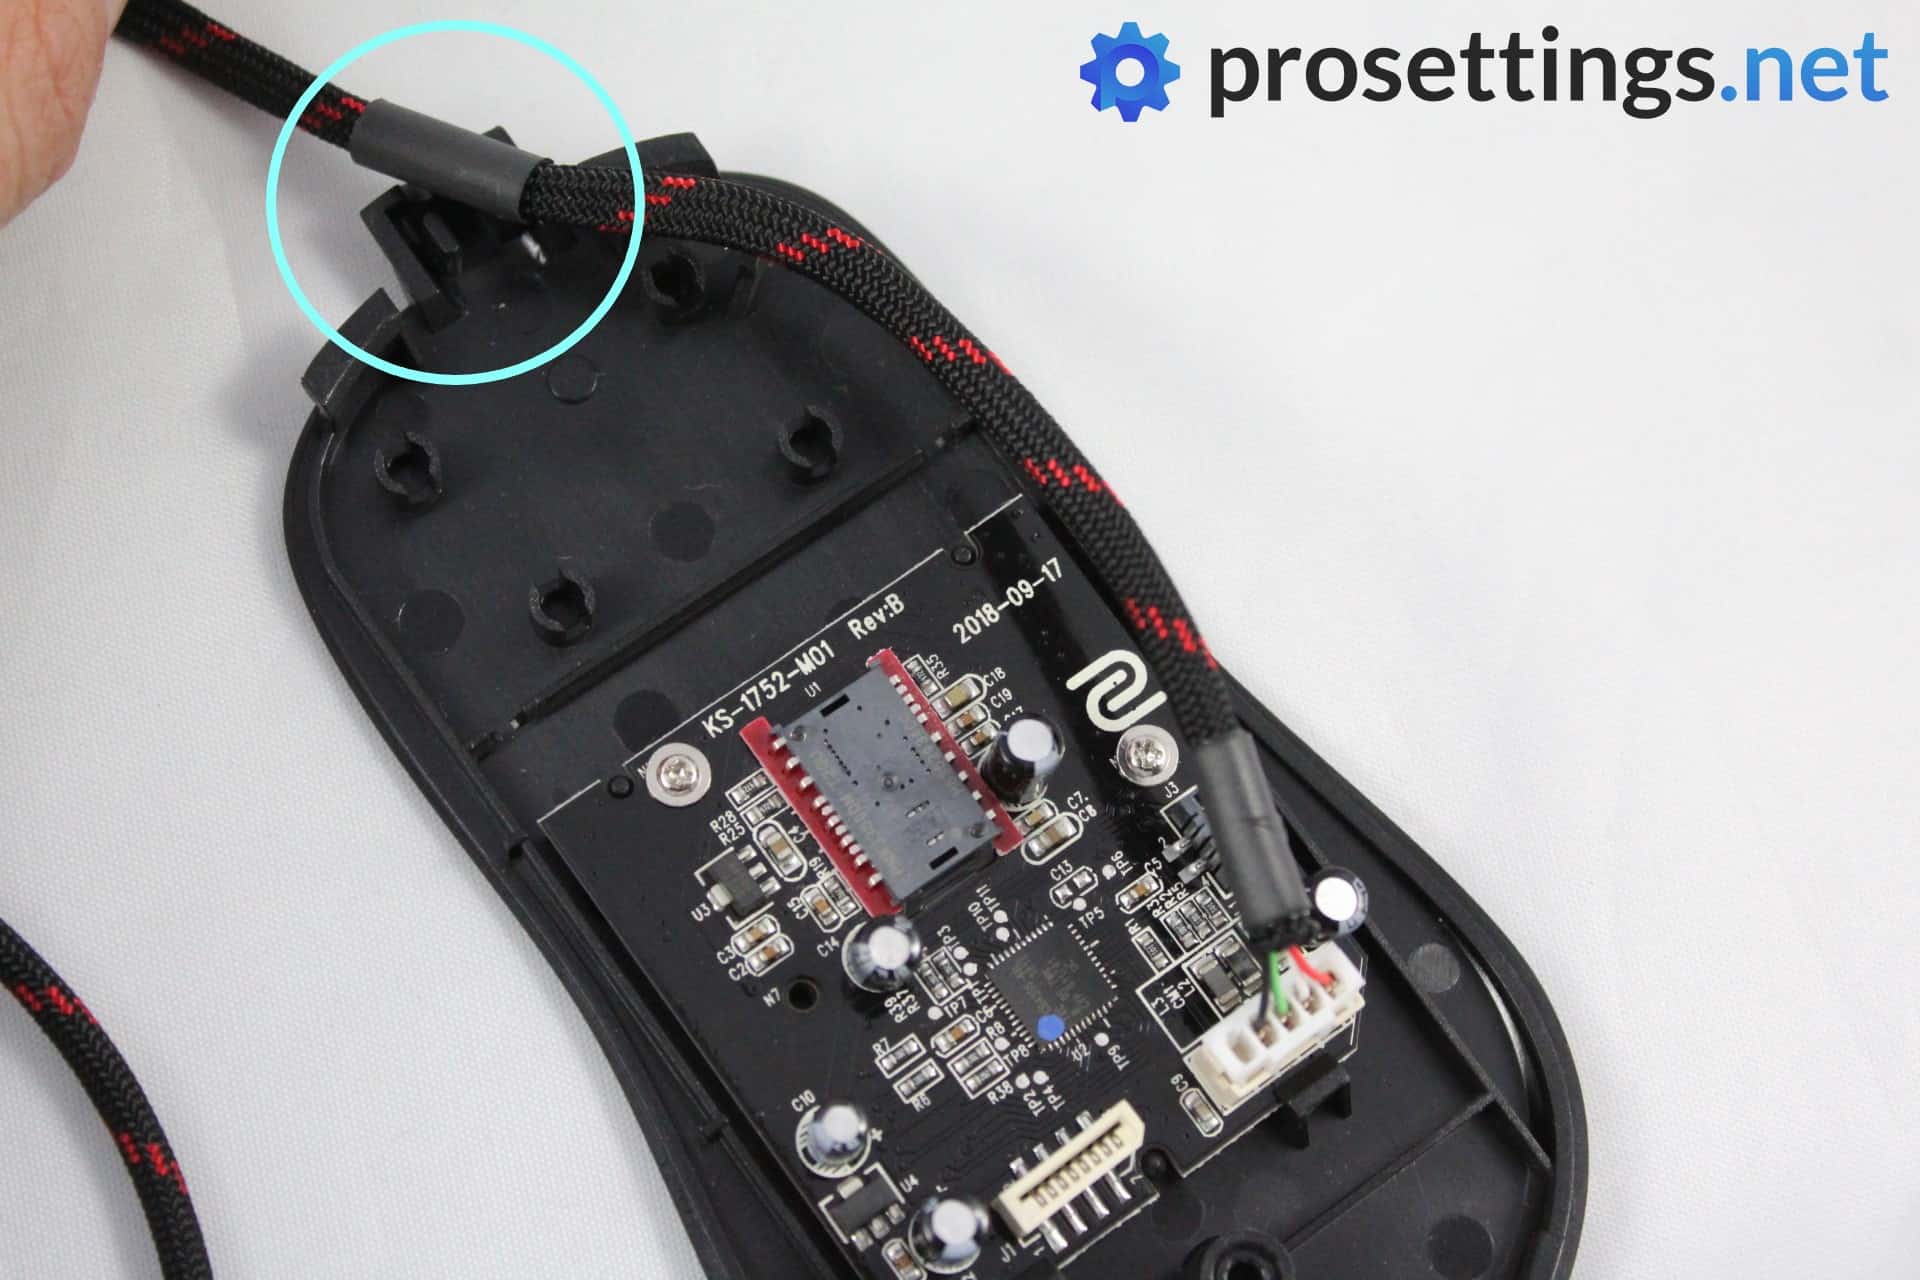
Shrink the unused rubber (so the one that will be placed at the ‘shell exit’) with your heat element. Again: do not expose it to heat for too long and, if using a flame, only expose it to the blue/invisible part of the flame. The rubber will quickly shrink which prevents it from moving around so make sure you’ve got it in the right spot.
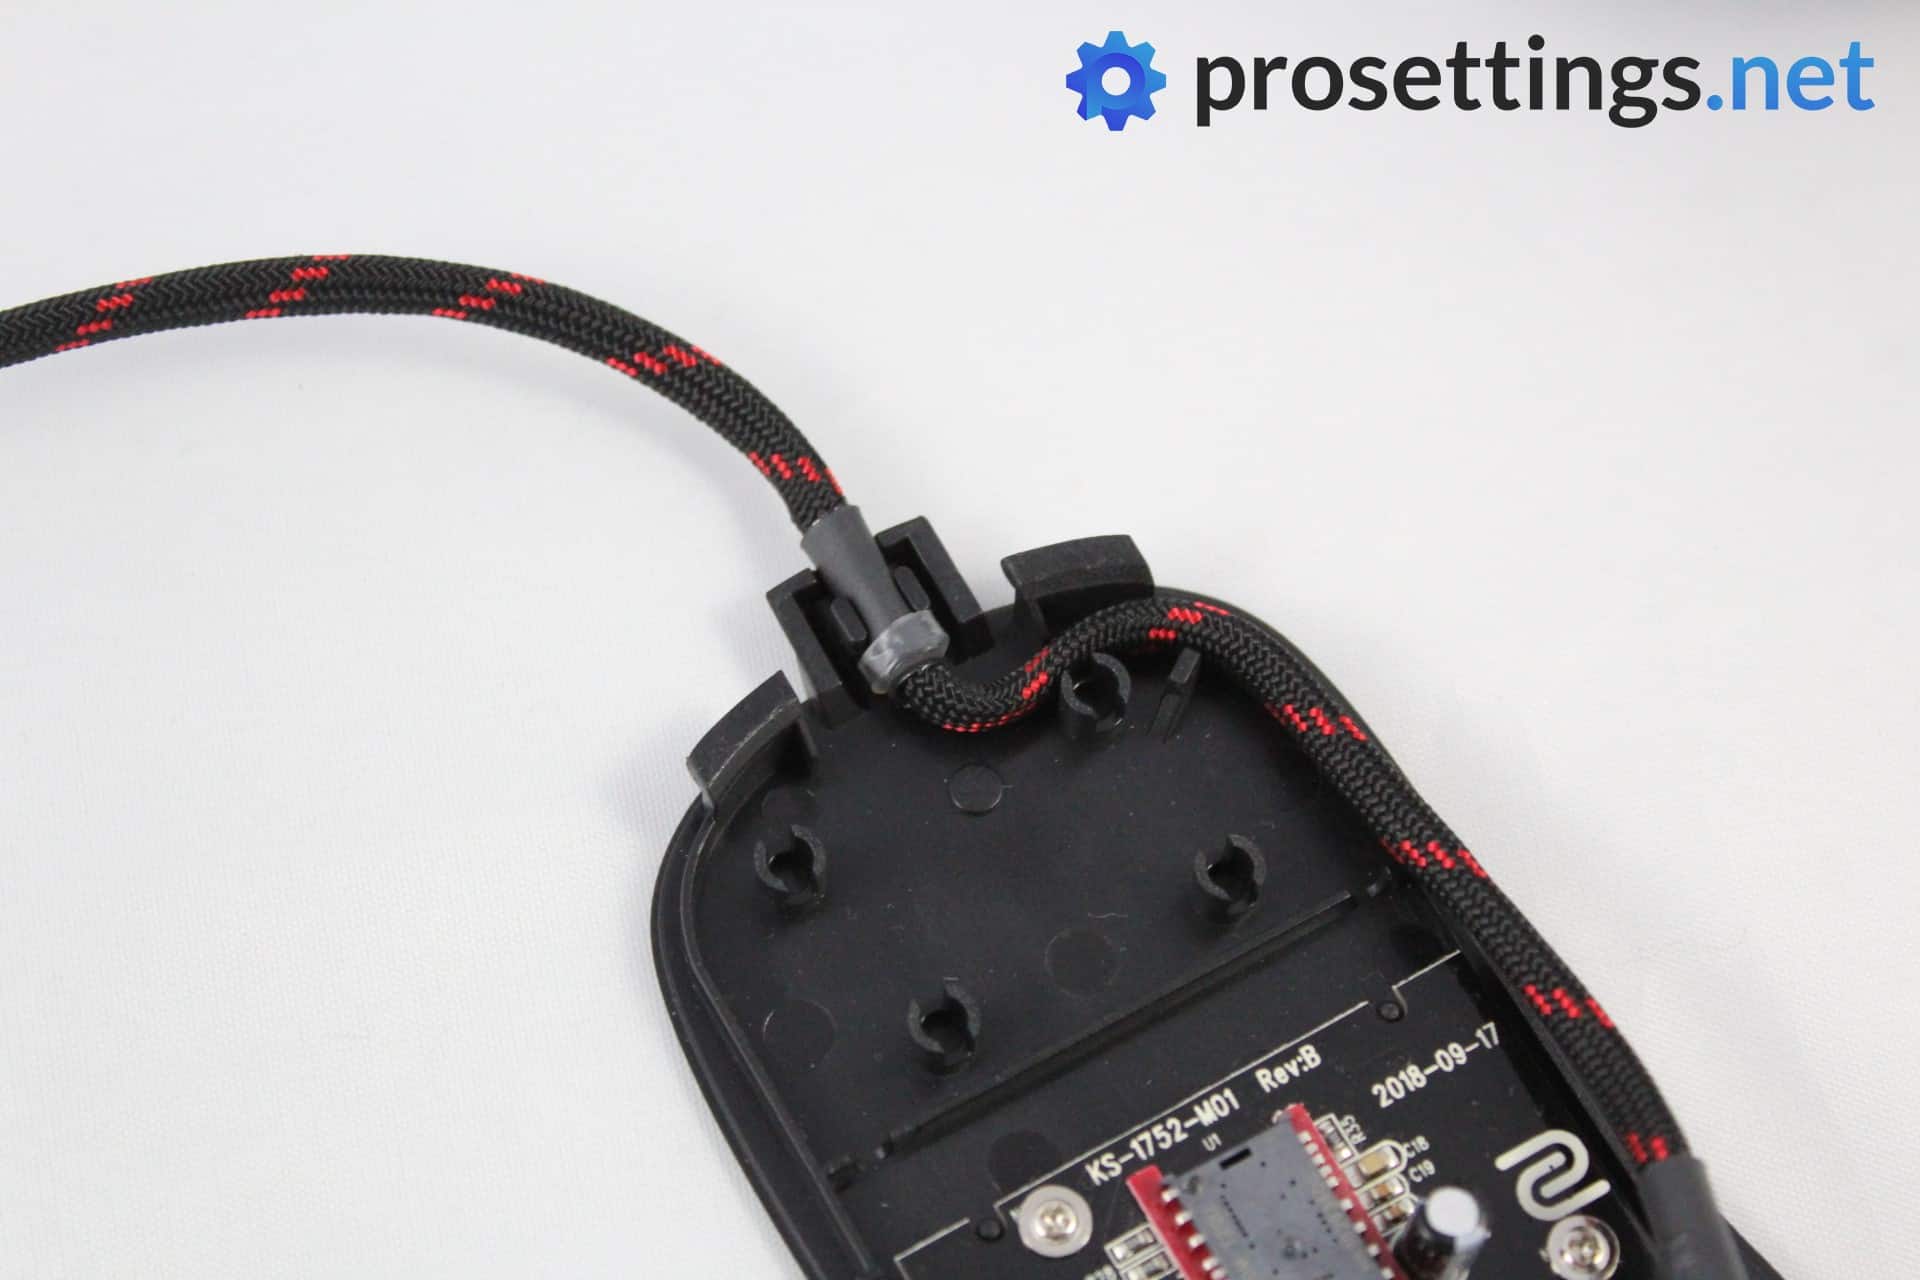
If there’s a rubber ring on the cable you should now heat shrink it so that it’s positioned inside of the shell. This prevents the cable from moving further out of the shell; you don’t want to accidentally disconnect your cable during gaming or anything like that so this little plastic ring is important to keep the cable in place.

Install the cable. This is simply a matter of connecting it to the PCB, routing the rest of the cable through the original cable route and then securing the rubber part properly in place.
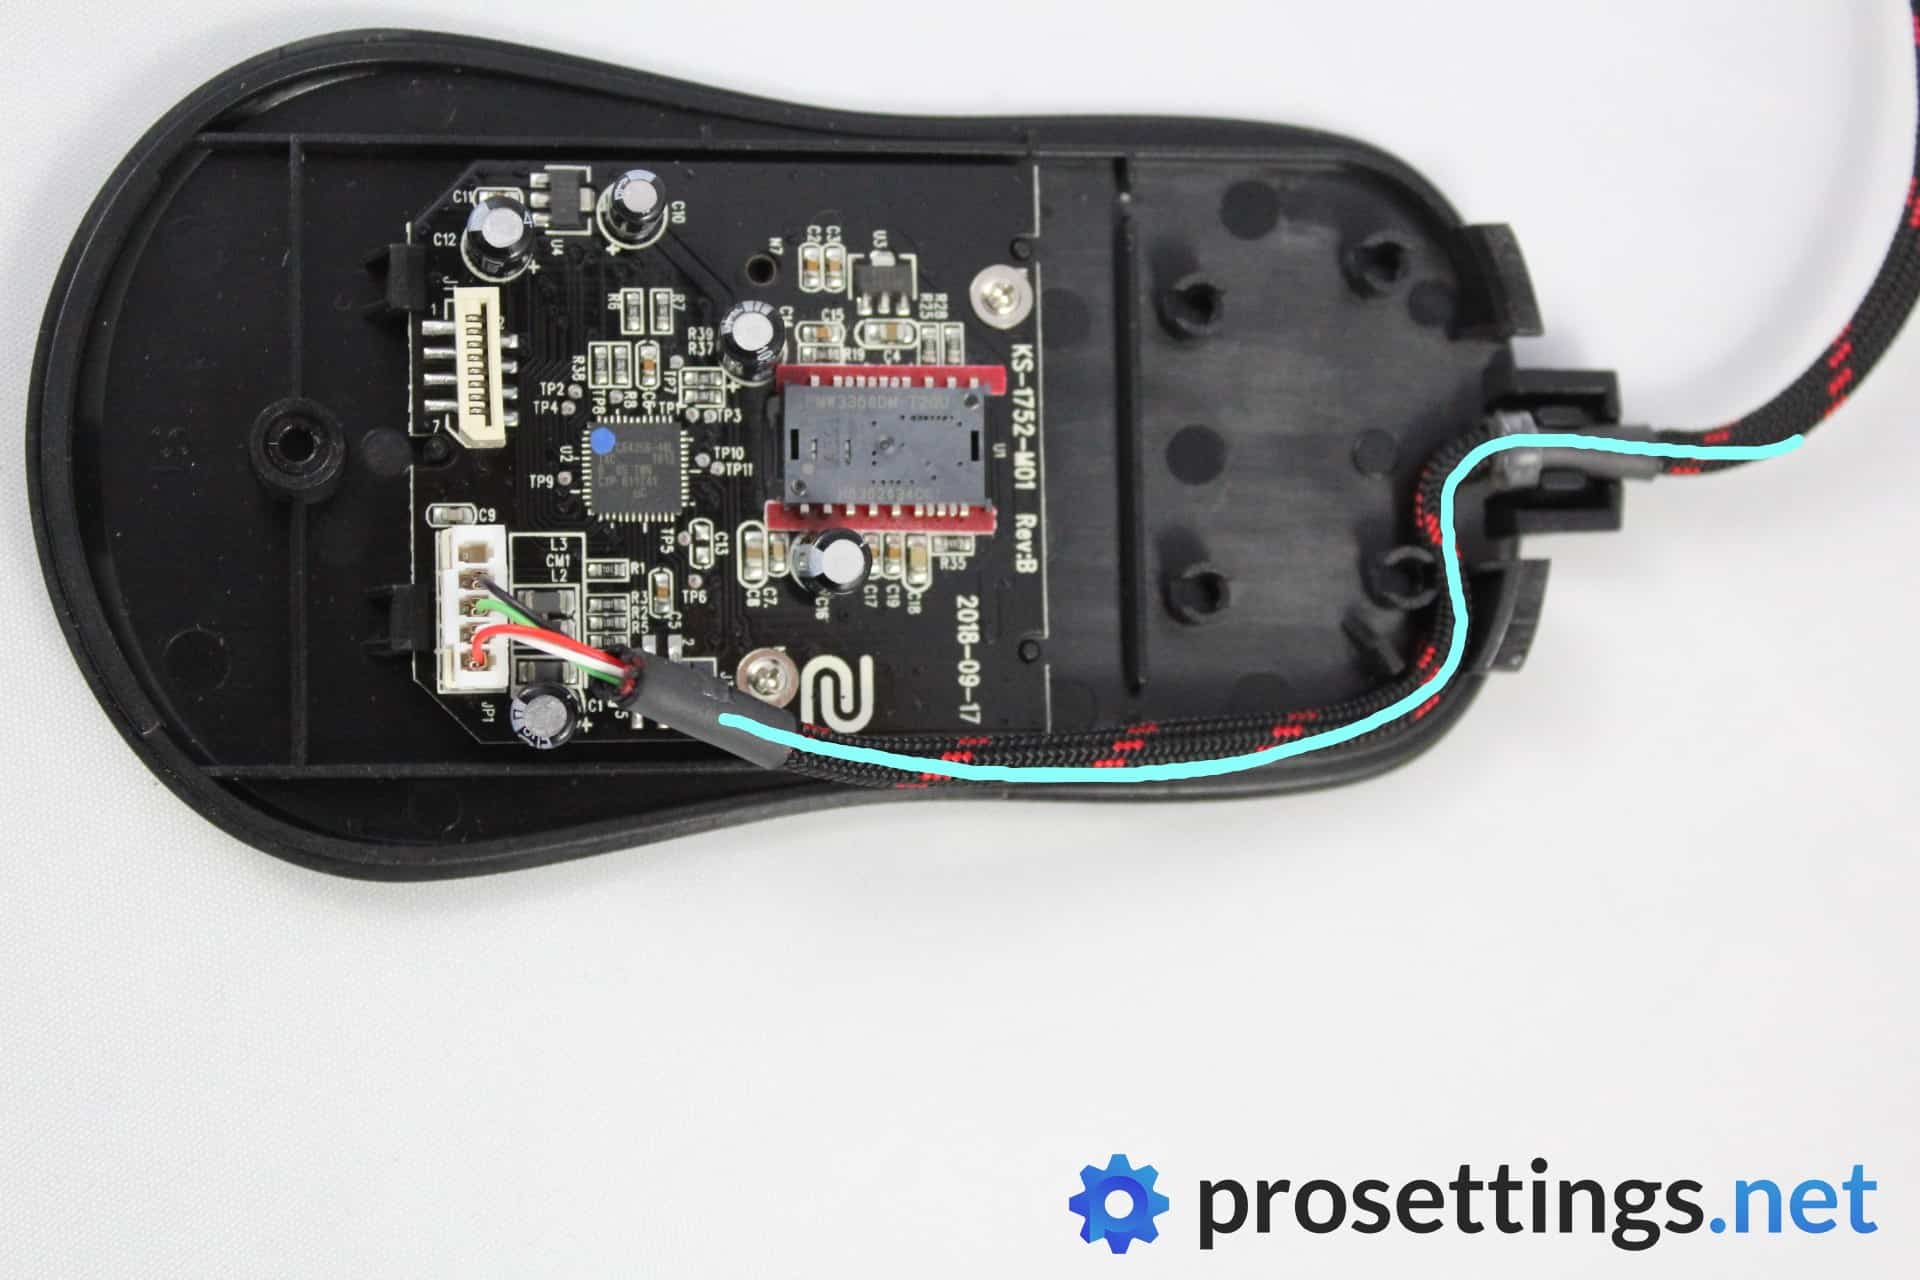
Make sure the cable is out of the way of the rest of the mouse, then (if you’ve detached them before) reattach the ribbon cables. You can test the mouse by reattaching both halves of the shell and clicking all buttons as well as use the scroll wheel in all directions. If everything works you’re good to go, otherwise you’ve probably got a bit of cable interfering with your scroll or buttons so you’ll need to move that out of the way.
You can also test if the mouse works at this point by plugging it in. If the DPI buttons, lighting, and so on light up and it tracks (simply test this by running your hand underneath the sensor) you should be golden.
Once everything works it’s a matter of reattaching both halves of the shell, screwing in the screw(s) that hold the shell in place, and reapplying your new feet (see above). Enjoy your custom mouse!
Other common mods
Other common mouse mods are the installation of grip tape (this can be tailor-made and shaped for a certain mouse but you can also use other kinds of athletic grip tape that you cut yourself) for a better grip/customized fit. This is really as easy as buying the tape and applying it to the correct areas. Fitting your mouse with grip tape is the easiest mod to do as there’s no chance of lasting damage at all: if you don’t like the tape you can just peel it off and your mouse will be the same as before.
Something that’s also done which is relatively non-invasive is sanding down the shell. If your favorite mouse is only available in a glossy coating you can use a very fine piece of sandpaper to sand off the gloss but of course this is a much more permanent mod and one you can’t come back from.
These are the most basic forms of mouse modding. Of course you can go very far with all of this by custom painting your mouse, replacing the switches, … but all of that requires at least some prior knowledge whereas the mods in this article can be done with relative ease without any prior experience. Hopefully this has helped you. Good luck with your modding!
how bout the scroll wheel is there no mod for that ?
That’s easy and requires no soldering? Not really.